Home decor has always been one of my passions. After years of experimenting with different materials and techniques, I’ve found that plaster is one of the most versatile and creative mediums for making beautiful wall art.
In this Nousdecor article, Mark Cutler will share my favorite Plaster Wall Art Materials and how to use them to make stunning decorative pieces. Whether you’re an aspiring artist or simply want to spruce up your home’s ambiance, read on to discover the magic of plaster!
Takeaways
- Plaster of Paris is the most common plaster material used for wall art due to its smooth finish and fast drying time. It can be molded, sculpted, or used in relief.
- Polymorph plastic is a moldable thermoplastic that turns hard at low temperatures. It allows for very intricate and detailed plaster wall art.
- Natural materials like sand, seashells, and pebbles can be embedded in wet plaster to create organic, textured effects.
- Acrylic paints adhere beautifully to cured plaster. They allow for vivid, durable color.
- Plaster wall panels are pre-made boards that can have plaster applied to them for convenient backgrounds.
Plaster Wall Art Materials
Plaster may seem like an unusual artistic medium, but it has been used by sculptors and artisans for centuries. Here are the main types of plaster materials I utilize in my work:
Plaster of Paris
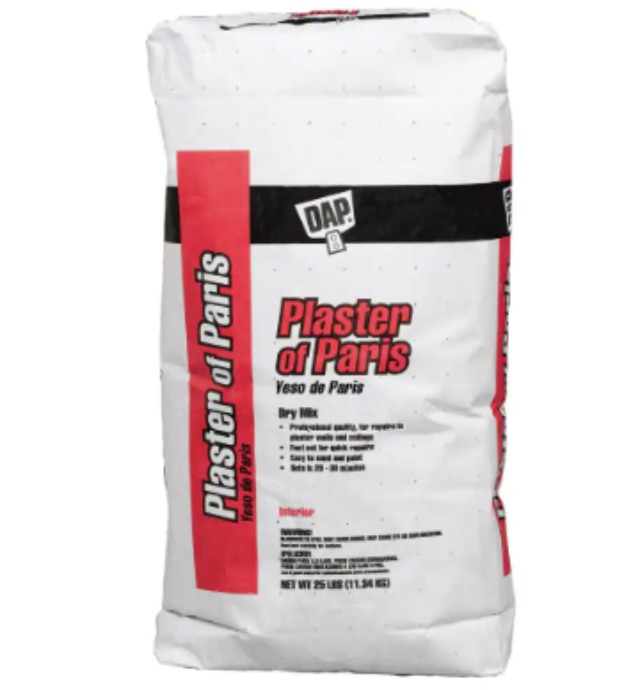
- The most common and versatile plaster for wall art
- Powder that is mixed with water
- Has a smooth, bright white finish when cured
- Dries quickly, usually within 30-60 minutes
- Can be molded, sculpted, carved, or used in relief
- Strong but also delicate – easily damaged if handled roughly
Polymorph Plastic
- A thermoplastic that becomes pliable at 140°F – 160°F
- Can be shaped intricately by hand before hardening at room temperature
- Holds very fine detail and won’t deform over time
- More durable than the plaster of Paris for thin or delicate pieces
Natural Materials
- Sand, seashells, pebbles, etc. can be pressed into wet plaster
- Add organic, natural-looking textures
- Complex patterns and pictures can be created
- Provides visual and tactile interest
Acrylic Paints
- Adhere beautifully to cured plaster
- Offer vibrant, durable colors with a matte finish
- Are water-based and low-odor
- Allow for creative painting techniques like blending or sponging
Plaster Wall Panels
- Pre-made plasterboard sheets that mount on walls
- Provide a ready background surface for applied plaster
- Come in convenient sizes for large wall art pieces
- Create a unified look when doing repetitive patterns/designs
Techniques for Creating Plaster Wall Art
Now that I’ve summarized the main materials, here are some of my favorite techniques for turning them into beautiful plaster art:
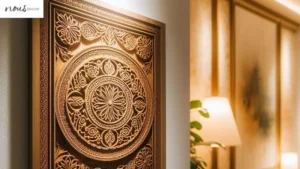
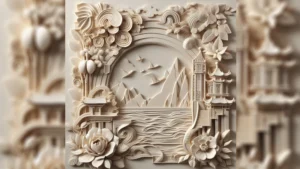
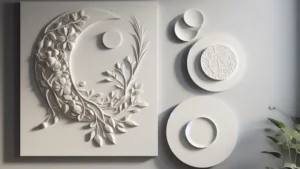
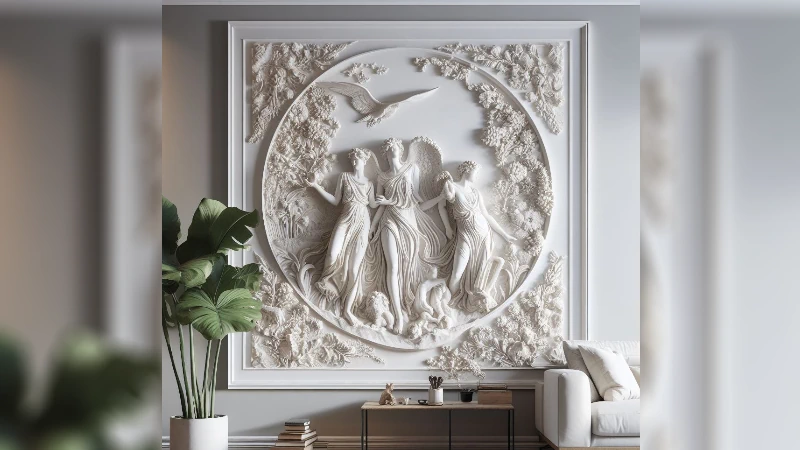
Relief Carving
Relief carving involves sculpting shapes and designs that project slightly from a flat plaster plaque. The steps include:
- Mix the plaster of Paris and pour it into a mold or frame for the plaque.
- Let the plaster completely cure/dry. This takes 30-60 minutes.
- Use wood carving tools to “draw” and carve into the surface, removing background plaster.
- Refine details and allow plaque to fully cure overnight before painting.
- Paint the carved design with acrylics and mount it on the wall.
Relief carving allows the creation of highly detailed wildlife, flowers, landscapes, or abstract motifs. The surface carving creates shadows and depth.
Sculpting/Molding
For a freestanding sculptural piece, you can mold wet plaster directly with your hands. The process is:
- Apply petroleum jelly to hands and workspace to prevent sticking.
- Mix a small amount of plaster. Knead it until thoroughly combined.
- Quickly shape the plaster into the desired form before it hardens.
- Allow the completed piece to cure on a nonstick surface for at least 24 hours.
- Once fully cured, decoration options include painting, gilding, or applying collage materials.
Sculpting is great for creating organic shapes, figurines, or decorative wall plaques. The plaster captures every fingerprint and texture as you mold it.
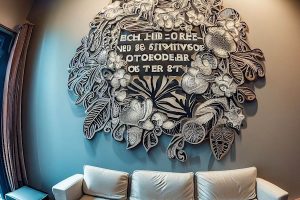
Textured Collage
This fun technique involves embedding found materials directly into wet plaster to create collaged wall art with lots of unique textures. You can use:
- Sea glass, shells, pebbles, beads, etc. for shimmer and organic interest.
- Scraps of fabric, burlap, lace, or ball fringe trimmed to shape.
- Die-cut craft paper, tissue paper, or maps to add color.
- Gears, game pieces, watch parts, keys, or other found objects.
- Apply a layer of plaster in a frame or on a panel.
- Press materials into the wet plaster, moving them around until you get the desired composition.
- Let the artwork cure completely, then apply a protective sealant if desired.
The combinations are endless! This is a great way to create colorful, interactive art kids will love.
Helpful Tips

After creating plaster wall art for many years, I’ve gathered some helpful tips to share:
- Always let plaster fully cure before handling to prevent breakage – wait at least 24 hours.
- Wear a particulate mask when mixing plaster to avoid breathing in dust. Work in a ventilated area.
- Coat molds with petroleum jelly before pouring in plaster for easy release.
- Save scraps of unused plaster to patch any cracks or defects in cured pieces.
- Mistakes can become “happy accidents”! Don’t throw failed pieces away, work with the flaws.
- Apply varnish or clear acrylic sealer on finished pieces to protect and extend their lifespan.
- Check out our other articles on can you paint old plaster walls, affordable plaster art kit, modern plaster wall sculptures, and beautiful plaster wall ornamentation.
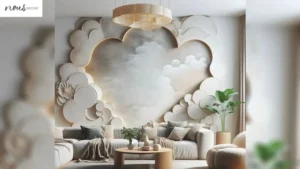
Don’t be afraid to experiment and get creative with your plaster canvases! Let the organic nature of the material inspire you.
Frequently Asked Questions
Conclusion
I hope this overview has inspired you to explore the creative possibilities of plaster for making beautiful, unique wall art. Its organic, malleable nature allows for achieving effects that are impossible with other rigid art media. With some basic materials and techniques, you can let your inner artist run wild.
Plaster art adds tactile, textural interest to any room. It blends modernity and classic artisan craftsmanship. If you’re feeling stagnant in your home decor, handmade plaster art can bring an infusion of energy and style. The artistic process itself is also relaxing and rewarding.
Surround yourself with pieces that make you smile each time your eyes land on them. The wildlife relief carving in the dining room, the beach glass collage in the bathroom, the mod geometric figures in the office – let plaster be your next DIY adventure as home wall art to elevate your decor!