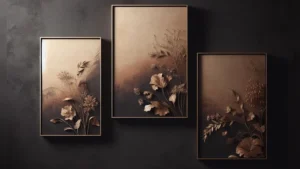
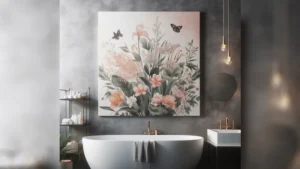
As a long-time DIY enthusiast and interior decorator, I absolutely love creating unique plaster canvas art for my home with DIY Plaster Canvas Art Materials.
After years of experimenting with different techniques and plaster wall art materials at Nousdecor, I’ve gathered my best tips on how to make your own stunning works of art. From preparing your canvas to choosing paints and sealants, Mark Cutler, will walk you step-by-step through the plaster canvas art process.
With a bit of creativity and these DIY instructions, you’ll be able to design personalized statement pieces to liven up any room. So grab your plaster and let’s get crafting!
Takeaways
- To prime canvases for plaster, use gesso or latex-based primers for best adhesion. Apply 2-3 coats, sanding lightly between each layer.
- Choose water-based acrylics for painting old plaster walls like a pro since they bond best. Latex house paint also works well. Avoid oils.
- Mix joint compound with glue and water to create plaster. Aim for a creamy peanut butter consistency.
- Apply plaster in layers, letting it dry fully between coats. Sand lightly to help layers adhere.
- Seal artwork with water-based polyurethane or acrylic mediums to protect it from moisture and yellowing.
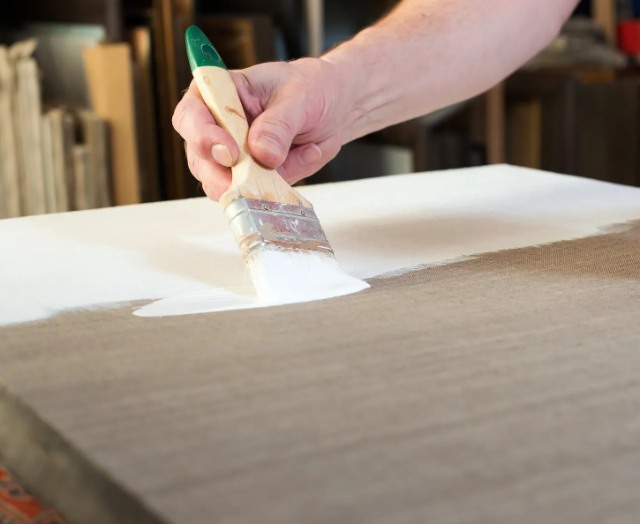
Preparing & Priming the DIY Plaster Canvas Art Materials
The first step in any plaster canvas art project is preparing your surface. I recommend starting with a traditional cotton duck canvas for the best plaster adhesion. Stretch and mount the canvas over a wooden frame or stretcher bars, securing it tightly. Make sure the canvas is free of defects, bumps, or loose threads that could show through the plaster.
Once your canvas is prepped, the next vital step is priming. Priming creates a barrier between the canvas and plaster to prevent moisture absorption and adhesion issues down the road. It also provides a lightly textured tooth for the plaster to grip.
For priming plaster canvases, I suggest using white gesso or a heavy-bodied latex-based primer. Both offer great coverage and adhesion. Avoid oil-based primers, as these can cause cracking or flaking issues with plaster. Here are a few of my recommended primers:
- Liquitex Gesso
- Golden Gesso
- Zinsser Bulls Eye 1-2-3 Primer
Apply 2-3 coats of primer, allowing each layer to fully dry before adding the next. Lightly sanding between coats with 220-grit sandpaper will help remove any bumps and create a smooth surface. Be sure to coat the sides of the canvas as well for a fully sealed surface.
Once your canvas is primed, it’s ready for plaster!
Mixing & Applying Plaster
Now for the fun part – mixing and applying the artistic plaster wall decor kit! While there are premixed plaster options available, I prefer to make my own from a joint compound. This allows me to fully control the thickness and texture.
To mix plaster:
- Start with premixed joint compound (sometimes labeled as drywall mud). The joint compound contains plaster of Paris along with binders and polymers for adhesion.
- Gradually stir in a small amount of wood glue – this acts as an added binder for strength.
- Slowly add water and mix to reach a smooth, creamy peanut butter consistency. Take your time, allowing the joint compound to dissolve fully to avoid lumps.
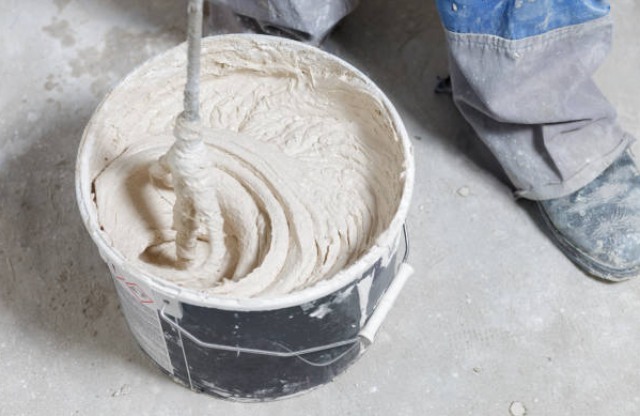
The exact measurements will vary based on the size of your canvas, but a general guideline is:
- 1 cup joint compound
- 1-2 Tbsp wood glue
- 2-4 Tbsp water
Once your plaster is mixed, you’re ready to start applying it to your primed canvas. I recommend doing this in thin layers, allowing each coat to fully dry before adding the next. This prevents cracking and helps ensure proper adhesion.
Here are some tips for applying elegant plaster wall hangings:
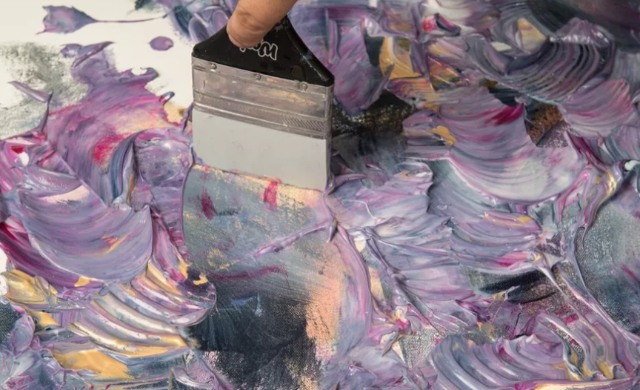
- Use a trowel, putty knife, or drywall knife to apply a smooth, even layer across the canvas. Apply in different directions to fill the weave.
- Add texture with tools like a trowel, brush, sponge, or crumpled paper. Texturing between layers helps with adhesion.
- Allow at least 24 hours of drying time between coats. Drying can take longer in cool, humid environments.
- Lightly sand each layer with 220 grit sandpaper before adding the next coat. This smooths the surface and creates teeth for better adhesion.
- Build up layers slowly until you reach your desired plaster thickness. I recommend 3-6 thin coats.
Once your final plaster layer has dried fully, your canvas is ready for painting and sealing!
Painting & Sealing Plaster Canvas Creations
The possibilities are endless when it comes to painting your plaster canvas art. Let your creativity run wild! I like to use a combination of water-based acrylics and latex house paints which adhere well to plaster.
Here are a few of my top painting tips:
- Start with a basecoat of latex house paint which readily absorbs into the plaster. I love soft neutral shades for an earthy base.
- Layer on acrylic paints for bold pops of color and dimension. Metallics and shimmers add an eye-catching sheen.
- Use a variety of techniques – try sponging, stippling, color-blocking, or even embedding objects into the wet plaster. The texture hides flaws!
- Avoid oil-based paints, as these may crack or peel. Always test new paints on plaster scraps first.
Once your masterpiece is complete, it’s crucial to seal it properly for longevity. I recommend using a water-based sealant like polyurethane or acrylic resin. This prevents moisture damage and yellowing.
Follow these tips for sealing:
- Allow the paint to cure fully – at least 7 days. Test a small area to ensure the paint is dry before sealing.
- Apply 2-3 thin coats of sealant, following product instructions. Lightly sand between coats with 320-grit sandpaper.
- Select a semi-gloss or matte finish for a subtle sheen. Glossy finishes can highlight imperfections.
- Coat all painted edges and sides to fully protect the artwork.
- Allow 1-2 weeks curing time for sealant to reach full hardness and durability.
Frequently Asked Questions
Conclusion
With the right materials and a dash of creativity, it’s simple to produce stunning works of plaster canvas art for your home decor.
I hope these DIY instructions have inspired you to get started on your own plaster masterpiece. Experiment, play, and above all – have fun! Don’t be afraid to make a mess and learn as you go.
Your unique wall art decor will add personal flair and texture to any living space. So grab a canvas and whip up a plaster creation that you’ll cherish for years to come!