Adding unique wall decor is one of the easiest ways to instantly transform any space. If you want to make a Plaster Wall Art DIY piece with loads of cool patterns, you’ve come to the right place. In this comprehensive guide, I’ll walk you through everything you need to create affordable abstruse plaster-made wall decor and patterned coarse pieces to liven up your home decor.
Let’s get started on bringing these trendy contemporary pop art decor ideas to life in your space. I’m excited to share all my tips and tricks for making beautiful patterned wall decor you’ll love showing off.
With the right guidance from Nousdecor, you’ll end up with professional-looking creative wall decor that seems far more expensive than it is!
Key Takeaways
- Making DIY plaster-made wall decor only requires a few simple materials like joined compound, latex paint, and canvas.
- You can create endless design varieties from abstruse shapes to landscapes.
- Proper preparation and securing are key to ensuring your cement art lasts.
- Troubleshooting tips will help you avoid common mistakes.
- This easy Wall Art Decor trend is perfect for beginners!
What is a Textured Plaster Wall Decor?
Textured wall art decor canvas art and plaster-made wall decor refer to artwork that utilizes thick plaster, joined compound, or similar material to create relief surfaces and abstruse shapes. This type of wall decor coarse ranges from geometric patterns to floral shapes and landscapes. The cement adds beautiful dimensionality and visual interest.
Plaster-made wall decor offers an affordable way to add modern, artsy accents to your walls. The finished pieces look chic and can complement any decor style from boho to contemporary. With the right securing, the plaster-made wall decor will last for years of enjoyment.
It’s also a satisfying DIY art project that allows you to create one-of-a-kind artwork with simple materials.
Tools and Materials Needed
Here are the supplies you’ll need to make your own plaster-made wall decor:
- Canvas (stretched canvas, wood panel, or coarse board)
- Joint compound or plaster
- Paintbrushes
- latex paint in white and other colors
- Water
- Containers for mixing
- Putty knife or plastic spreader
- Trowel
- Drop cloths
- Painter’s tape
- Sealant like polyurethane
Miscellaneous optional tools:
- Stencils
- Sponges
- Rubber stamps
- Found objects for patterns
Preparing Your Home Decor Space
Before starting your plaster-made wall decor project, it’s important to properly prepare your space:
- Cover surfaces like floors and furniture with drop cloths. Plaster can get messy!
- Have your coarse ready. For wall pieces, attach Canvas to the wall with painter’s tape. For tabletop art, place the coarse on a flat work surface.
- Gather all materials and tools and place them nearby. Make sure your cement and paints are easily accessible as you work.
- Wear clothes that can get messy, as the cement may splatter.
- Ensure you have proper ventilation. Open windows and use fans if needed.
Advance preparation will allow you to focus on the creative plastering process without worry. Now let’s get to the fun part – plastering!
Easy and Affordable Plaster Wall Art DIY Guide
Follow these simple steps to make your own beautiful patterned plaster-made wall decor:
Step 1: Choosing a Design
The first step is deciding on a design for your art piece. Here are some plaster-made wall decor ideas to get your creativity flowing:
- Abstruse organic shapes and lines
- Geometric triangular, square, or circular patterns
- Silhouettes of flowers, leaves, or trees
- Animal shapes like butterflies or birds
- Landscapes like mountains, sunsets, or trees
I suggest starting with an abstruse or geometric design if this is your first time. Keep it simple as you build your skills. Use stencils, stamps, or objects as guides if desired. Sketch your design idea with a pencil first.
Step 2: Mixing the Plaster
In a container, mix your cement according to the package directions. For most standard joined compounds, you’ll need a ratio of around 2 parts cement to 1 part water. Adjust amounts as needed to achieve a thick, moldable cement pattern. Allow cement to fully dissolve in water.
Step 3: Applying the Plaster
Using a putty knife, trowel, or plastic spreader, apply a thin even layer of cement over the entire coarse surface as a basecoat. Allow to dry completely.
Next, begin adding cement to your desired design using a putty knife or by hand. Apply cement liberally, in thick layers to create lots of great patterns. For dimensional pieces, let layers dry between applications. Smooth and shape the cement as needed with tools. Allow cement to fully dry overnight.
Step 4: Finishing and Sealing
Once the cement has dried, it’s ready for the finishing touches. Lightly sand any rough areas. Then use latex paint as desired to add color. White paint is perfect for a clean modern look, but feel free to get creative!
Finally, seal your piece with a clear latex sealer like polyurethane. This protects the cement and enhances the color. Add 2-3 coats allowing drying between coats. Then proudly hang and display your patterned artwork!
DIY Plaster Wall Art Trends: From Abstract to Landscape Designs
The design options are endless with plaster art. Here are some creative wall art decor concepts to spark inspiration:
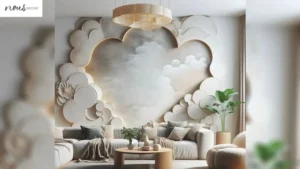
Abstruse Designs
Go for bold, artsy abstruse shapes and patterns. Geometric designs using squares, circles, or triangles have a modern feel. Or make free-form organic cement shapes in flowing lines or splatters. Sticking to 2-3 colors like black, white, and grey keeps it clean and sophisticated.
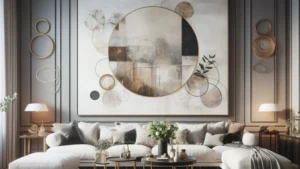
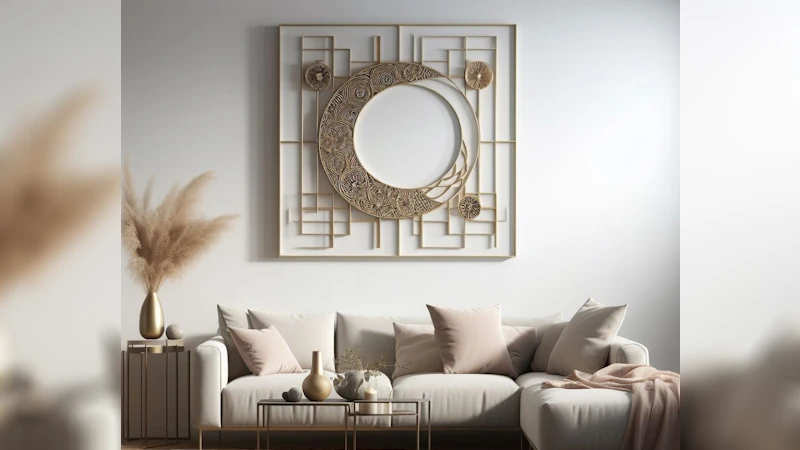
Geometric Designs
interlocking geometric shapes make for artsy wall décor. From concentric circles to intersecting diamonds, symmetry and patterns are visually engaging. Vary line thickness for dimension. Keep it monochromatic or introduce pops of color. Metallic paints also add intrigue.
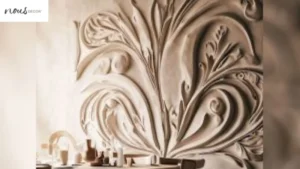
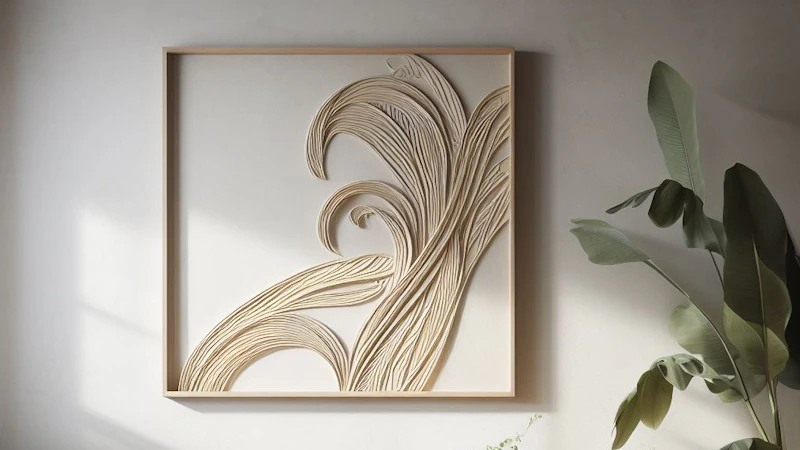
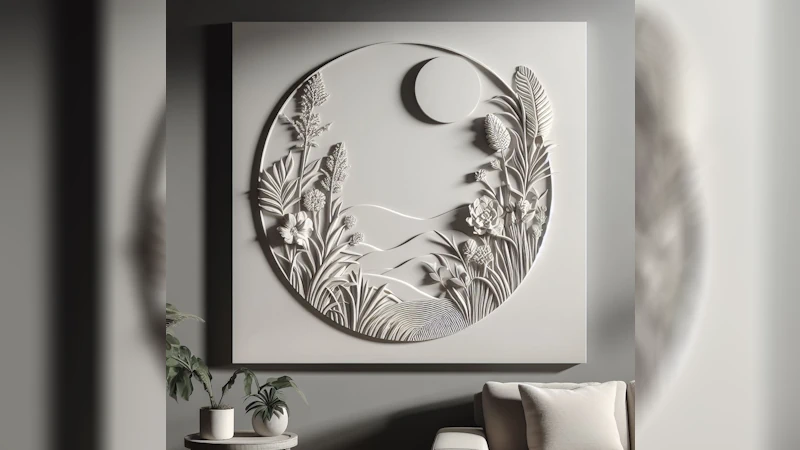
Floral Designs
Stylized floral designs work beautifully to bring natural elements indoors. Create simple daisy, rose, or leaf shapes in cement bas-relief. Add details like stems and botanical accents with paint or additional cement layers. Soft pastel colors enhance the organic vibe.
Animal Designs
Incorporate favorite animals like deer, birds, butterflies, or feathers into your cement art. Keep them abstruse by focusing on shapes and outlines. Or go more realistic with details. Use white cement on black coarse for dramatic silhouettes. Metallic gold or silver paint adds elegance.
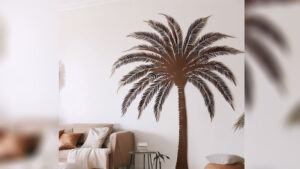
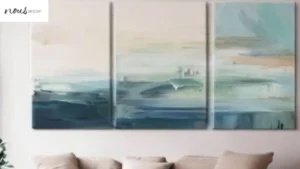
Landscape Designs
Recreate organic scenery like mountains, sunsets, forests, or beaches in layered ultra-patterned plaster. Build up dimensions to mimic the natural terrain. Soft blue, green, and sand colors transport the viewer to serene natural spaces. Add found objects like shells or stones for realism.
Now that you’re feeling inspired, use these concepts as springboards to create your own personalized designs that you’ll absolutely cherish. Let your creativity shine!
Troubleshooting Tips
Like any new DIY project, you might encounter some bumps in the road. Here are my top troubleshooting tips for getting the best possible results:
- If cement cracks while drying, the layers are too thick. Allow proper drying time and keep layers thin.
- Prevent cracking by mixing cement very smooth and sieving for lumps.
- If the paint bleeds or discolors, the cement doesn’t fully dry. Let it dry for at least 24 hours before painting.
- For a smooth finish without brush marks, dilute paint with a little water and use high-quality synthetic brushes.
- If paint chips, the cement and paint layers weren’t properly secured. Always use a sealant like polyurethane.
- For outdoor use, get outdoor-rated sealant and use more water-resistant plaster-like concrete patches for creative outdoor wall art for your space.
Let me know if you have any other questions! Proper techniques will prevent most issues and lead to wall decor you’ll absolutely cherish.
Frequently Asked Questions
Conclusion
I hope you’re feeling inspired to create your own beautiful patterned plaster-made wall decor! With the simple techniques and guide provided here, you can craft affordable statement-making art from basic materials.
Let your unique style shine through in the design. Abstruse, geometric, floral, animal, or landscape themes provide endless possibilities. Properly seal the finished piece to enjoy for years in any room.
Plaster-made wall decor and patterned coarse allow anyone to become an artist. Set aside a creative afternoon to make DIY art you’ll be proud to display. Embrace imperfections – they add to the handmade charm. Once you try this addicting medium, you’ll quickly want to make more!