Want to spice up your home with beautiful wall art but don’t know where to start? This comprehensive guide will walk you through everything you need to know on How To Mount Wall Art like a pro.
From preparation to placement, we at Nousdecor will cover techniques to properly showcase your favorite artworks across any wall surface. Read on for tips to create a stunning exhibit wall that reflects your personal style.
Key Takeaways of How To Mount Wall Art
- Prepare your wall surface and use appropriate hooks/hardware for the wall material
- Arrange art composition compositionally using principles like the rule of thirds
- Hang art at eye level and use gallery strips to properly space pieces
- Adjust picture lights and frames to draw attention to your artwork
- Add personalized touches like family photos and meaningful quotes
Whether you want to hang a statement piece over the couch or create a dazzling exhibit wall in the dining room, hanging art properly showcases your decor and makes a stylish impact. Follow these best practices for an art showcase you’ll love.
Preparing Walls and Surfaces
The first step to hanging art is ensuring you have a suitable wall surface. Carefully preparing the area will allow your art composition to shine.
For drywall, fill any holes or imperfections with spackle and sand smooth once dry. Paint the wall a neutral color to avoid clashing with colorful artwork. Be sure to use high-quality latex paint with a satin or eggshell finish for a subtle sheen.
On wood walls, clean thoroughly and apply a fresh coat of paint or stain for a blank canvas. Distressed wood with character can complement vintage style art, or go for a sleek modern look with glossy paint.
Consider the weight of your art composition – lightweight canvas prints can be hung on most surfaces, but heavier materials like metal or wood require more reinforced walls.
Pictures without nails are great for apartments where you can’t make holes. Adhesive hooks, removable putty, or magnets offer non-permanent solutions.
Once your wall surface is prepped, it’s time to focus on the art itself.
Choosing Artwork and Frames
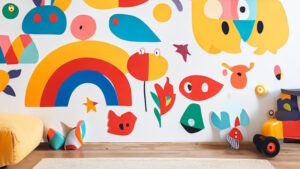
When curating art composition for your exhibit wall, look for superior wall art ideas and photography that capture your personality. From abstract paintings to baby wall art decor, choose subjects and styles you connect with.
Keep the wall space in mind – smaller prints suit narrow hallways while expansive living rooms can house grand statements. Scale art composition appropriately for the size of the wall just like with affordable Christmas wall art downloads or unique boho-inspired wall decor.
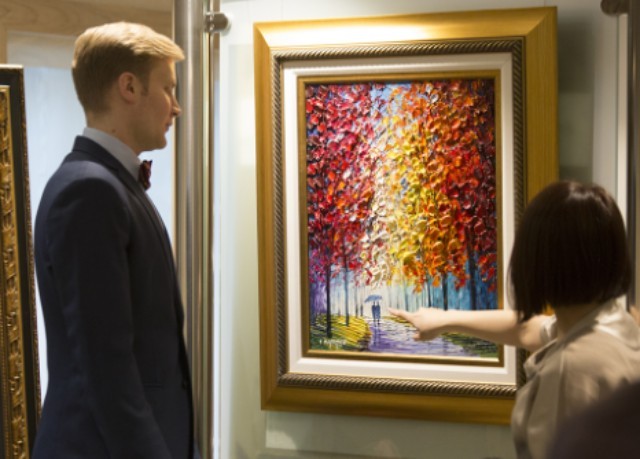
For a unified look, select frames that complement each other. Black frames lend a classic feel while distressed wood and metallic finishes exude rustic and modern vibes respectively.
Whatever your taste, quality framing draws eyes to the art while protecting it. Look for acid-free materials like sustainable wood frames and UV glass to prevent fading.
Arranging and Hanging Your Artwork
Once you’ve selected stellar pieces, it’s time for the fun part – arranging! Use these techniques to artfully display your collection:
- Follow the rule of thirds: Divide the wall into thirds vertically and horizontally to find natural placement points. Position major artworks at intersections for a pleasing, balanced composition.
- Place stunning art near eye level: For the optimal viewing experience, hang focal artworks 60-66 inches high. This allows viewers to admire works head-on.
- Use gallery strips: These thin ledges mount evenly across a wall to display multiple frames in straight rows. Strips make it easy to hang clusters of same-sized art at consistent heights.
- Space art 2-4 inches apart: Allow breathing room around frames to avoid a cluttered look. Gap widths will depend on the size and number of pieces.
- Build around a center point: Identify one prominent piece to anchor the arrangement. Build outward in a pyramid formation to create flow.
- Add personalized touches: Incorporate special mementos like vacation photos or inspirational quotes alongside wall art to infuse personality.
- Step back and refine: After hanging the initial pieces, step back and evaluate the overall look. Adjust spacing or swap art composition until satisfied.
Follow your artistic eye, tweaking placements and rearranging until you achieve the perfect exhibit wall that showcases your style.
Hanging Tips By Wall Material
To safely and securely mount your framed works, use these techniques tailored to each wall type:
Drywall
- Use drywall anchors and screws for heavyweight pieces over 10 pounds. For lighter art, adhesive hooks often suffice.
- Pre-drill holes for anchors slightly smaller than screw girth to allow threads to grip.
- For removable art, double-sided stripping tape sticks nicely without damaging drywall.
Wood
- On wood walls, opt for finishing nails or wood screws. Predrill pilot holes to prevent splitting.
- For a temporary option, touch fasteners adhere securely to wood surfaces without hammers or nails.
Concrete or Brick
- On masonry surfaces, use plastic anchors and screws for hanging. Tap anchors gently with a hammer for a snug fit.
- Sticky tack putty offers removable adhesion without drilling holes in concrete or brick.
Metal
- For metal walls or hanging heavy items like mirrors, use self-adhesive hooks rated to hold significant weight.
No matter the wall material, check that hangers are rated to hold the weight of the artwork. Heavier pieces require more reinforced hanging hardware.
Illuminating Your Art
Proper lighting showcases art while setting a mood. Use these lighting tips:
- Spotlights – Position adjustable picture lights above focal pieces to illuminate. Go for focused beams or wide floods depending on the piece.
- Overhead – Install overhead lighting on dimmers to control brightness in a room. Brighter light highlights art details while dim mood lighting adds atmosphere.
- Natural Light – Strategically hang sun-sensitive pieces away from windows and allow controlled natural light on durable works.
- Accent – Use table or floor lamps to cast accent lighting on displayed art for dramatic effect. Warm bulbs bring out colors.
Lighting completes the look and affects how viewers engage with your collection. Use a mix of lighting types to make your art pop.
Style Inspiration for Every Room
Not sure where to hang art? Any room offers possibilities:
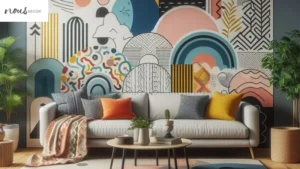
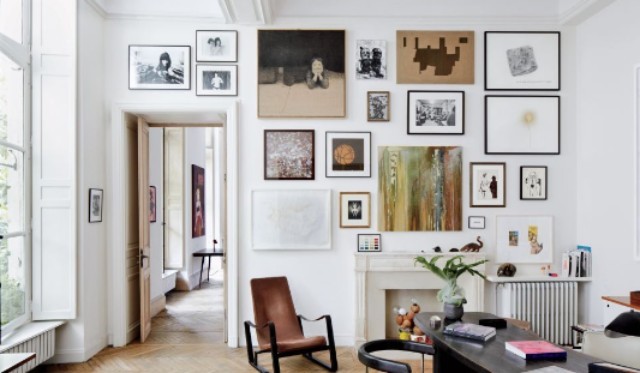
- Living Room – An exhibit wall behind the couch makes a dynamic statement. Go bold with massive abstracts or showcase a cluster of family photos.
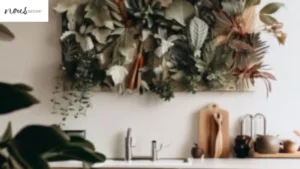
- Kitchen – Energize your cooking space with vibrant printable kitchen art for walls like fruits, herbs or coffee. Group colorful canvas prints for an artful accent wall.
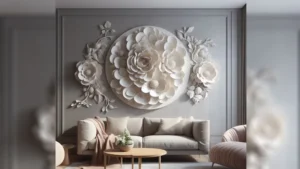
- Bedroom – Calming landscapes and floral works evoke serenity. Hang metal wall art depicting nature right over the headboard.
- Home Office – Stimulate creativity in your workspace with prints of book pages, writers’ quotes, or blueprints.
- Bathroom – Set a soothing ambiance in the bath with misty landscape photos, wire wall sculptures, or a spotlit mirror.
- Hallways – Maximize narrow passages by lining the length with art, family photos, or a gallery wall. Create an artistic journey from room to room.
However you utilize wall space, let your personality shine through. The right art transforms any home into a living gallery reflecting your passions.
Tips for Gallery Wall Success
The exhibit wall remains a popular way to showcase a collection across a larger area for visual impact. Use these top tips when planning your own:
- Choose an accent wall with ample open space. Prime spots include above couches or beds, on stair risers, or covering one kitchen wall.
- Gather art and frames in various shapes, sizes, and subjects. Include meaningful souvenirs like event tickets or award certificates among wall art.
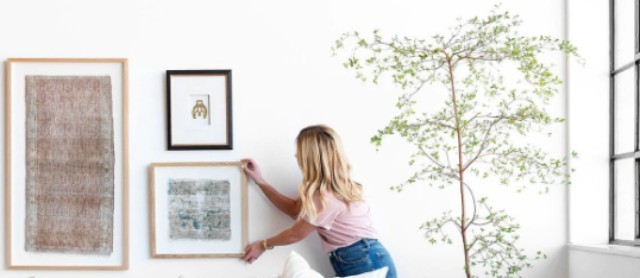
- Lay pieces on the floor to experiment with engaging arrangements before hanging. Photograph layouts you like.
- Hang the largest ‘anchor’ piece first, then build outward in pyramid style. Vary heights and subjects for interest.
- Use removable adhesives or gallery strips to hang clusters so you can reposition pieces easily during the design process.
- Step back frequently to evaluate balance and make adjustments. You can’t go wrong by following your instincts.
- Inject personality with unexpected touches like hanging a bike wheel or string lights among framed pictures.
With thoughtful planning and experimentation, your exhibit wall will become a stylish accent filled with memories and meaning.
Frequently Asked Questions
Conclusion
The right wall art instantly livens up any space while expressing your style. With this guide’s tips for thoughtful selection, strategic arrangement, proper hanging techniques, and complementary lighting, you can create a dazzling art wall.
Wherever you choose to showcase treasured paintings, prints, or family photos, let your collection speak volumes about this special point in your life.