Plaster is an amazing medium for creating beautiful and unique Plaster Wall Hanging Art. With just a few simple materials and some basic techniques, you can craft stunning decorative pieces that will instantly elevate any room.
In this comprehensive Nousdecor guide, Mark Cutler will walk you through everything you need to know to start making your own plaster wall hangings and take your home decor game to the next level.
Key Takeaways
- Choose a mold that you find visually interesting to form the base of your piece. Geometric and organic shapes make for great wall hangings.
- Mix the plaster properly to a smooth, lump-free consistency like pancake batter before pouring it into the mold. Let it fully cure for at least 48 hours.
- Incorporate color and textures with tempera paints and add-ins like sand or pebbles to create unique designs. Metallic powders also add nice accents.
- Find inspiration from nature, color palettes, or your own meaningful symbols. Let your creativity shine!
- Apply a sealer or finish for added protection and durability. Use hanging hardware that can securely support the weight of plaster.
- Make it personal. The best wall hangings reflect something meaningful about the creator. Add your own special touch!
Gather Your Plaster Wall Hanging Art Supplies
Before you begin any plaster project, you’ll need to gather a few required materials like plaster canvas art how to:
- Plaster – Plaster of Paris is readily available at most craft and hardware stores. For wall hangings, aim for a 2-4 lb bag.
- Mold – This will form the base shape for your wall hanging. You can find pre-made plaster molds online or at craft stores, or make your own custom molds.
- Water – Mix your plaster to the proper consistency.
- Container – A large plastic or metal container for mixing the plaster.
- Dye – (Optional) Liquid or powder tempera paints for coloring the plaster if desired.
- Sealer – (Optional) A clear acrylic sealer for finishing the piece.
- Hanger – Hardware for mounting your finished wall hanging on the wall. Command strips work great.
Other handy supplies include a stir stick, plastic gloves, petroleum jelly for greasing molds, sandpaper, clean rags, and a plastic drop cloth.
Mixing Plaster for Wall Hangings
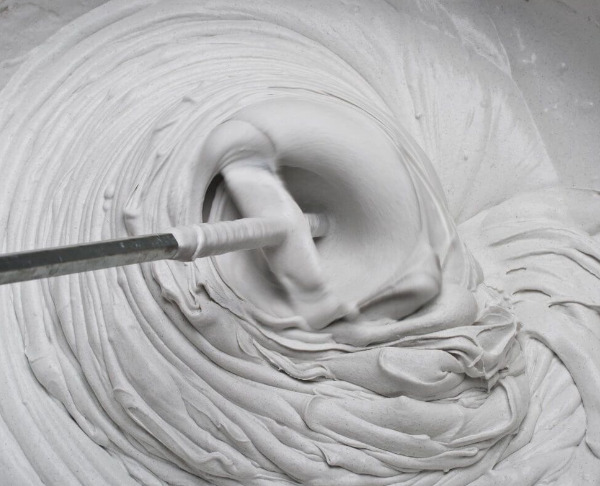
The plaster needs to be mixed to just the right consistency before pouring it into your mold. Here is a simple plaster mixing technique as sturdy plaster wall hooks for decor:
- Measure out dry plaster according to package directions based on the size of your mold. For most wall hangings, 2-3 cups is a good starting point.
- Add measured dry plaster to your mixing container.
- Add roughly half the volume in water. Don’t add too much at once.
- Stir vigorously for 2-3 minutes, until thoroughly blended. The mixture should be smooth and free of lumps.
- Add small amounts of water and stir to achieve a “pancake batter” consistency. Too thin and it will be hard to control when pouring.
- For colored plaster, add powdered or liquid tempera paints now. Start with just a few drops or sprinkles of color and increase as desired.
- Stir for a few more minutes once the color is added to evenly distribute it.
Pro Tip: For the whitest white plaster, use warm water when mixing. Cool water can make it appear more grey.
Choosing a Wall-Hanging Mold
The mold you choose will determine the shape and design of your finished wall hanging. Here are some of the most common types of molds and patterns to consider:
- Geometric shapes – circles, squares, triangles. Create abstract designs or symmetrical patterns.
- Letters and words – spell out names, inspirational phrases, or words of your choosing.
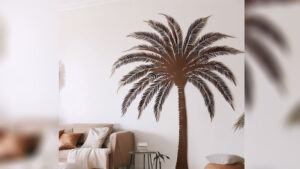
- Natural shapes – seashells, leaves, feathers, trees. Capture organic textures.
- Frames – square, circular, and scalloped frames make for easy basic wall hangings.
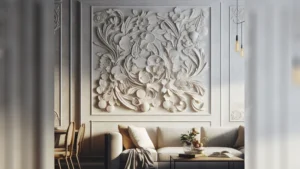
- Relief panels – detailed decorative molds with raised patterns.
- Found objects – make a mold from any object by pressing it into clay, silicone, or plaster.
For beginners, simple, smooth-sided molds are easiest to work with. As you gain experience, move on to more detailed molds with intricate shapes.
Pouring and Curing the Plaster
With your plaster mixed and mold ready, the fun part is pouring the plaster and letting it cure. Follow these steps closely:
- If needed, lightly grease the mold interior with petroleum jelly to prevent sticking.
- Slowly pour the prepared plaster into the mold, tilting to coat all sides and corners. Tap the mold gently to release any air bubbles.
- For multiple layers of color, pause for 30 minutes between pours to allow the plaster to set up partially.
- After the final pour, let the plaster cure fully undisturbed for at least 48 hours. Curing times can vary based on temperature and humidity.
- Once cured, gently flex the mold to loosen the hardened plaster piece. Carefully remove the wall hanging from the mold.
- For smooth edges, use a fine-grit sandpaper or sanding block to remove any small imperfections. Wipe clean with a dry cloth.
- Apply any desired finish like acrylic sealer or varnish for added protection. Use as directed.
- Add your choice of hanging hardware to the back and your unique plaster wall art recommendations for your home are ready to mount!
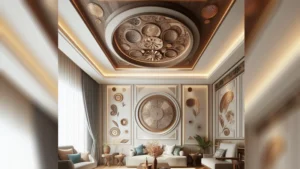
Design Inspiration for Plaster Wall Hangings
The wonderful thing about plaster is you can create just about any shape, color, or style of wall hanging your imagination dreams up. Here are some inspired design ideas to spark your creativity:
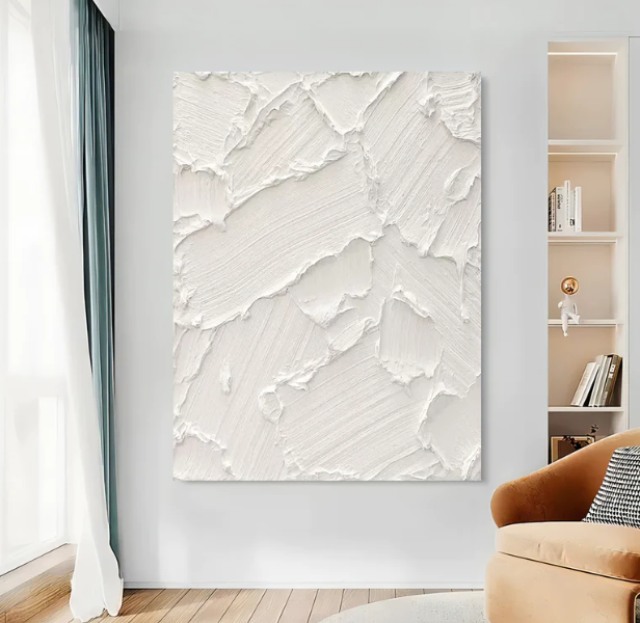
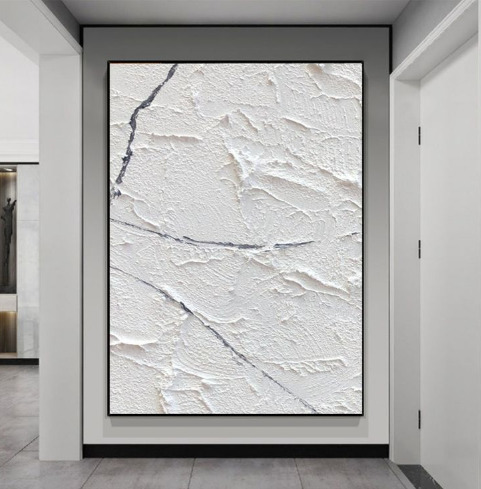
- Monochromatic color schemes – Stick with all white or shades of one color for a calm, coordinated look. Add texture with sand or pebbles.
- Metallic accents – Incorporate gold, silver, copper, or bronze powders into select areas for a touch of glamour.
- Nature motifs – Press real leaves or flowers into plaster before they set for organic impressions.
- Layered dimensions – Stack two or more thin hanging pieces on top of each other for added depth.
- Shadow boxes – Affix small objects inside a recessed panel for a special shadow effect.
- Vintage vibes – Use distressed crackle paints and antique-looking embellishments for old-world charm.
- Kid-friendly – Let children create their own plaster art pieces featuring their handprints or footprints.
The options for plaster wall hangings are limitless – be bold and imaginative in your designs!
Frequently Asked Questions
Conclusion
Creating DIY plaster wall hangings is an enjoyable way to produce stunning home decor items with a handmade look and feel. With a simple mold, basic plaster mixing techniques, and some creativity, you can craft wall art that’s distinctly yours.
Experiment with different shapes, textures, colors, and designs to make pieces that reflect your personal style. Give your wall hangings that special finishing touch by incorporating meaningful words, quotes, or objects inside them.
With the help of this guide, you now have the knowledge to design, mix, pour, and display your own beautiful plaster hanging art. Let your unique inspirations shine through in future plaster creations to adorn your home.
For more plaster wall decor guides, check out our articles on ancient origins of plaster wall decor and sculpting plaster for wall decor now!