Decorating your home with beautiful Plaster Wall Art How To doesn’t have to be difficult or expensive. With some basic supplies and a bit of creativity, you can easily make custom plaster pieces that will add visual interest and personality to any room.
In this comprehensive guide, I, Mark Cutler, will walk you through everything you need to know to start crafting your own plaster wall hangings at home, from choosing the right plaster materials to finishing techniques that will make your art really shine.
With just a little time and effort, you’ll be able to display gorgeous handmade plaster designs that everyone will admire. Read on with Nousdecor to learn now!
Key Takeaways
- Select the right plaster for your project – Plaster of Paris works for basic shapes while pottery plaster captures intricate detail.
- Use proper mixing techniques and ratios for a strong finished product. Gradually combine 1.5 parts water to 3 parts plaster.
- Craft molds from simple containers or get creative with press molds, cast molds, and freeform shaping techniques.
- Incorporate color by mixing tint into plaster or painting after pieces have cured.
- Finish wall art with sanding, priming, painting, and sealing to prepare for display.

Plaster Wall Art How To Select
The first step in creating plaster wall art is choosing the right type of plaster. Here are some of the most common varieties and their key characteristics:
- Plaster of Paris – A quick-drying plaster made of gypsum that’s easy to mix and pour into molds. It dries hard and smooth.
- Pottery plaster – Denser than Plaster of Paris, with a fine, creamy texture when mixed. It holds intricate details well.
- Modeling plaster – Has a similar density to pottery plaster but with a more fibrous texture. It can be shaped by hand and holds detail nicely.
- White casting plaster – Formulated to have high strength and hardness compared to standard plaster. Great for detailed casting.
For most basic plaster wall art projects, Plaster of Paris is a good choice and is widely available. For more intricate molds or shaped elements, pottery or modeling plaster will reproduce designs with sharp definition. Casting plaster is best reserved for specialty plaster pieces.
Key Supplies for Mixing and Pouring Plaster
Along with choosing the plaster itself, you’ll need some additional supplies for mixing, molding, and casting:
- A mixing container – A plastic bucket or large bowl works well. Avoid metal containers, which can react with plaster.
- Measuring cups – For accurately measuring out dry plaster and water. Use separate cups for each to avoid contamination.
- Mixing stick – A heavy-duty plastic or wood stick for stirring the plaster and water together smoothly.
- Mold – This could be a purchased plastic or silicone mold or an everyday object like a bowl or container.
- Drop cloth – To protect surfaces from spills and drips when pouring liquid plaster.
- Disposable gloves and mask – To keep hands and lungs protected from plaster dust.
With your materials gathered, you’re ready to start mixing up liquid plaster for pouring and shaping your wall art designs.
Mixing Plaster Properly is Key
The mixture of plaster and water, known as the matrix, is critical for creating strong finished pieces. Follow these tips:
- Always mix plaster according to package directions. The typical water-to-plaster ratio is 1.5 parts water to 3 parts plaster.
- Pour measured water into the mixing container first, then gradually add the dry plaster powder.
- Mix the plaster and water thoroughly until the mixture is smooth, with no lumps.
- Work quickly and pour immediately – plaster begins hardening in around 15-20 minutes.
Mixing the plaster properly ensures your finished art will cure to its maximum strength and withstand hanging on the wall without breakage or cracks.
Crafting Plaster Wall Art Designs
Once you have your plaster mixed, the fun truly begins! There are many creative ways to craft custom wall art from plaster:
Simple Molded Shapes
One easy way to start is by pouring liquid plaster into plastic or silicone baking molds to create simple geometric shapes. Some beautiful plaster wall art ideas for your home:
- Cake pans – For round discs or oval plaques
- Bundt pans – To mold circular plaques with decorative ridges
- Loaf pans – For square or rectangular shapes
- Silicone molds – Reusable molds for shapes like stars, hearts, circles, etc.
Just brush or spray the mold with cooking oil first so your plaster piece pops out easily after drying.
Advanced Mold Making
You can produce more intricate plaster pieces by making your own molds. Some methods to try:
- Press molds – Press objects into clay or modeling compound to create an impression, then pour plaster into the mold.
- Cast molds – Create a plaster mold around an object you want to replicate. Flexible silicone works best.
- Piece molds – Make a mold in sections if casting an irregular or complex object. Reassemble sections before casting.
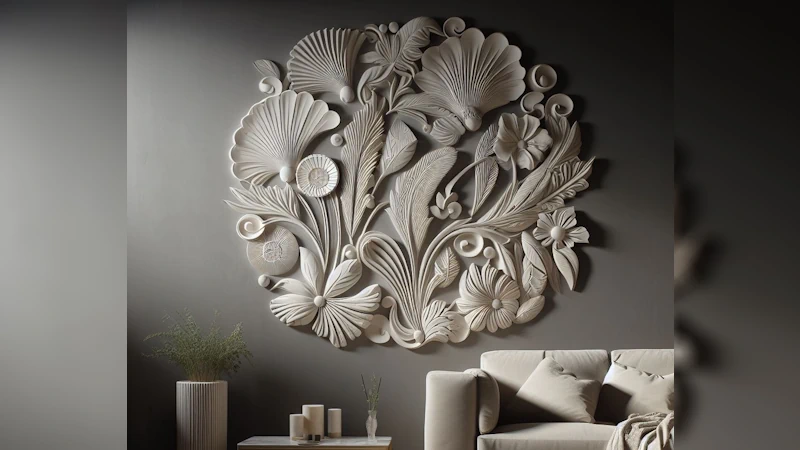
Found items like seashells, lace, leaves, buttons, or costume jewelry make great impressions and textures when used for press molds. For replicating 3D objects, cast molds take more effort but produce stunning results.
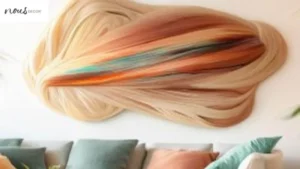
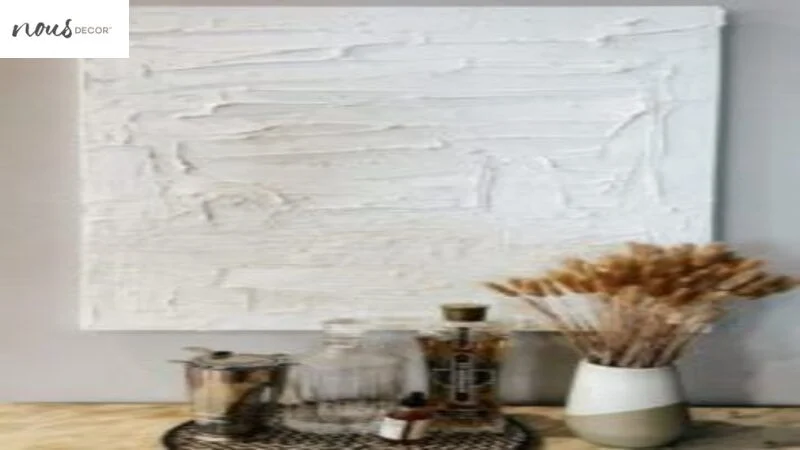
Freeform Plaster Shapes
For organic freeform shapes, pour or press wet plaster directly into forms without using a precise mold. Options include:
- Drape plaster-soaked fabric, burlap, or lace over an object and let it harden into a delicate hanging design.
- Press crumpled aluminum foil into plaster for an abstract dimensional piece.
- Sculpt shapes like bowls, vases, and boxes by shaping wet plaster with your hands.
The possibilities are endless for creating your own unique wall art using simple plaster casting techniques.
Incorporate Color
To add bold and beautiful color, try mixing acrylic paint or powdered pigment into wet plaster before pouring it into molds after choosing the right paint for plaster walls. Here are some options:
- Pre-mixed color – Add up to 1 tablespoon of acrylic craft paint per cup of plaster and mix in thoroughly. This integrates color throughout the entire piece.
- Layered color – Pour a thin base layer of tinted plaster first, then follow with remaining white plaster to create a two-tone look.
- Hand-painted – Once cured, unfinished plaster can be painted with acrylics in any design. Use an acrylic sealer when finished.
Experiment to create vibrant plaster art for any decor style, from pastels to neon brights.
Finishing Plaster Wall Hangings
After pouring and molding your plaster artwork, there are some finishing steps to complete before hanging your creation on the wall:
Allow Proper Curing Time
Give your plaster adequate time to fully cure and dry based on manufacturer guidelines. On average plaster needs 24-48 hours to cure, longer in cool or humid conditions. Rough handling or vibrating pieces before fully cured can cause cracks – so be patient!

Sand and Refine Edges
Once cured, use fine-grit sandpaper to smooth any rough edges and seams. Start with 120 grit and work up to 220 grit for an ultra-smooth sanded finish. Take care when sanding intricate details.
Clean and Prepare the Surface
Wipe sanded pieces with a dry cloth to remove all plaster dust. Apply latex primer to unpainted, unfinished plaster to prepare the surface for decorating.
Decorate and Protect
Embellish with paint, stain, plaster wall decor gold leaf, mosaic tiles, or any decorative elements you desire! Apply a clear acrylic sealer as a final step to protect your plaster and give a subtle glossy sheen.
Displaying Plaster Creations
The final step is deciding how to proudly put your plaster wall art on display. Here are some great options:
- Mount pieces in simple wood frames or on wood boards painted to match your decor. Use molding strips or nails to attach art to the background.
- Affix twine, wire, or fishing line to form a hanger on the back for hanging without a frame.
- For multiple small pieces, group in arrangements and adhere to background boards for unified gallery-style displays.
- Shelves provide perfect platforms for displaying sculptural bookends, vases, bowls, and box art.
However you choose to show off your handcrafted plaster designs, they are guaranteed to add artistic charm and visual texture to living spaces as stylish wall art with plaster for living rooms, bedrooms, and more in your home.
Frequently Asked Questions
Conclusion
Creating custom plaster wall art, from simple shapes to intricate sculptural pieces, is an immensely gratifying DIY project for enhancing your home with wall art. With the techniques outlined here, you can begin handcrafting beautiful plaster artworks infused with personal artistic flair.
Begin by gathering basic supplies, experiment with molding and shaping methods, refine the look with color and finishes, and then proudly put your plaster creations on display.
In no time, your distinctive plaster art will elevate your living spaces with handmade charm. So get ready to unleash your inner artist – your dream plaster designs await!