I’ve been fascinated with Wall Plaster Art Images ever since I first laid eyes on these textured masterpieces. There’s something magical about how subtle contours and delicate patterns seem to emerge from the wall itself.
In this article, I, Mark Cutler, will explore my favorite aspects of plaster wall art and how you can use it to transform any space.
Key Takeaways
- Plaster art creates stunning visual interest and unique textures on any wall.
- With countless customizable design options, it allows you to reflect your personal style.
- Plaster wall art ranges from geometric shapes to organic patterns like leaves, vines or trees.
- Professionals can install wall plaster art, but you can also create DIY pieces with some simple materials and techniques.
- Illuminating plaster art with well-placed lighting highlights the designs and creates striking effects.
- This art form provides an affordable way to add character and visual appeal to living rooms, bedrooms, and more.
The Allure of Wall Plaster Art Images
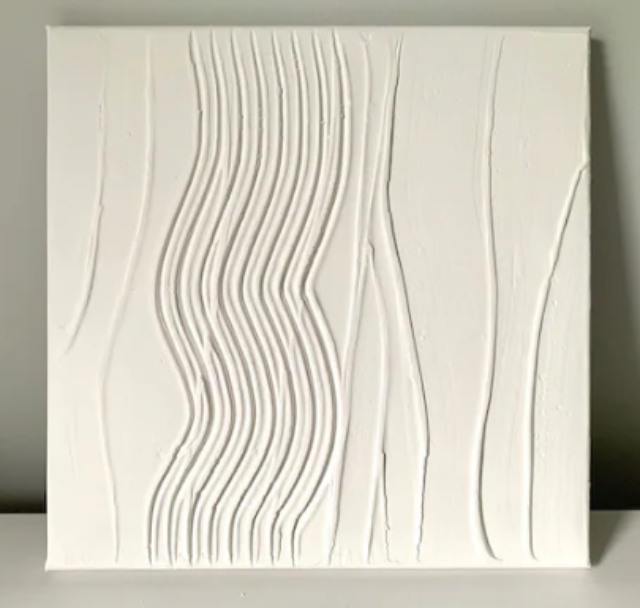
What I love most about plaster art is the texture and depth it adds to an otherwise flat wall. Depending on the technique, you can achieve anything from subtle undulations to bold 3D designs popping from the surface.
The natural variations in the plaster create shadows and contours that change throughout the day as light rakes across the wall. It’s these fluid shapes and contours that give plaster wall art its visual flair.
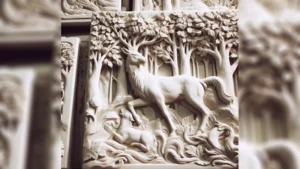
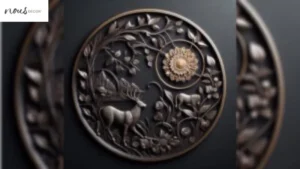
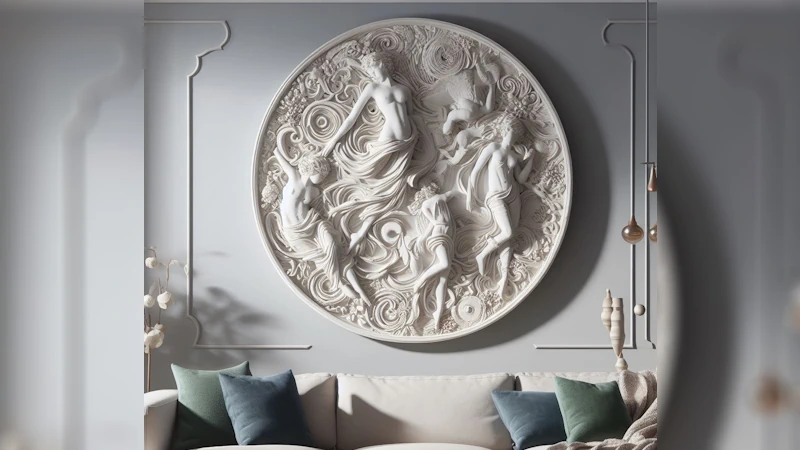
Beyond the textural interest, plaster art comes in so many diverse styles that it can suit any decor. You can mimic architectural moldings, create modern geometric patterns, or draw inspiration from nature with delicate foliage shapes and vines. This diversity makes plaster wall art an extremely versatile design element.
Plaster also offers a cost-effective alternative to more expensive wall-covering materials. It provides that coveted high-end look for a fraction of the price of stone, tile, or even wallpaper. For budget-friendly ways to dramatically transform your space, plaster art is tough to beat!
Common Styles and Designs
Some of my favorite plaster wall hanging art styles include:
Architectural shapes
- Crown molding
- Chair rail
- Wainscoting panels
- Columns or pilasters
- Medallions and rosettes
Geometric patterns
- Diamonds, triangles, circles
- Horizontal or vertical ribs
- 3D cubes and rectangles
- Herringbone
- Chevron
Organic motifs
- Leaves, vines, trees
- Flowers and petals
- Feathers or shells
- Abstract organic shapes
Monochromatic
- All white or single colored plaster
- Layers and ridges add texture
- Subtle and serene
Metallic
- Gold, silver, copper leaf inlay
- Hammered metal effect
- Adds glamour and shine
Faux finishing
- Trompe l’oeil painted scenes
- Marbling, wood grain, etc.
- Mimics other materials
This table summarizes some of the most prevalent styles of plaster wall art and their key characteristics:
| Style | Description |
|---|---|
| Architectural | Mimics crown moldings, panels, columns, and other building elements |
| Geometric | Angles, lines, circles, triangles create graphical designs |
| Organic | Flowers, leaves, vines, feathers create natural motifs |
| Monochromatic | Textured white-on-white or solid color for subtle effect |
| Metallic | Real metal leaf or paint creates glimmering accents |
| Faux Finishing | Painting mimics wood, marble, brick and other materials |
With this diversity, you can match the plaster art style to your overall interior motif. Go for an ornate Victorian look with architectural medallions. Try some Art Deco flair with geometric reliefs. Or explore whimsical nature motifs for a playful boho vibe. The options are truly endless!
Illuminating Your Plaster Art
Proper lighting takes any wall art to the next level, and plaster designs are no exception. Well-placed lighting casts dramatic shadows across textured surfaces and accentuates every contour of the plaster when crafting plaster canvas art step-by-step.
I recommend installing sconces or picture lights above any plaster focal points. Point the light directly on the artwork to highlight the details. Dimmers allow you to control the brightness and shift the shadows across the textures.
You can also use recessed ceiling lights or track lighting to rake light vertically across the entire wall, emphasizing the layers and shapes. Position adjustable heads to graze the wall and create more angular light patterns.
For a softer overall glow, install wall-mounted uplights pointing up toward the ceiling. The dispersed bounce light gently illuminates the wall’s contours. Place uplights strategically to avoid hot spots.
Finally, consider adding LED strip lights along the perimeter of your plaster artwork. Choose glow temperatures like warm white or blue to accentuate colors. You can even find RGB strips to create customizable colored light shows!
With the right lighting solutions, your plaster artwork will really pop off the wall and become a focal point of any room. Accent lighting transforms plain walls into vivacious works of art!
Creating DIY Plaster Magic
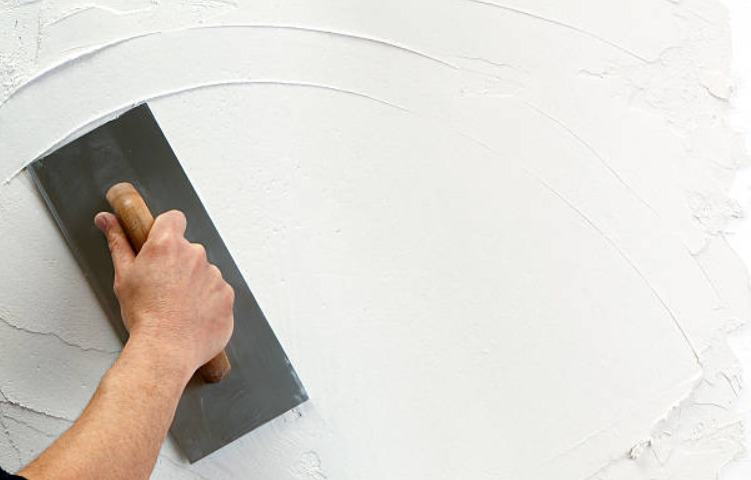
While hiring a professional plaster artisan can guarantee stunning results, don’t shy away from creating your own DIY plaster masterpiece! With a bit of practice, you can learn the techniques to add personalized designs to your space.
Here are a few beginner tips for crafting simple plaster wall art:
- Use a matrix like heavy paper or cardboard to map out your design. This gets placed against the wall and filled in with plaster.
- Build up depth by applying multiple thin layers of plaster, allowing each to dry before adding the next.
- Smooth with a trowel for a flat finish or use textured rollers and stamps to imprint designs.
- Mix in color tints or metallic powder for added flair.
- Consider joint compound for small DIY projects. It dries quickly and sands easily.
- Work in small sections and clean tools before the plaster dries for easy clean-up.
- Prime and paint when fully dry for a polished, protected finish.
Don’t be afraid to get creative and add personal embellishments like faux leaves or shells. The DIY route allows you to customize your home wall art that suit your style exactly to your taste. Let your creative spirit run wild!
Frequently Asked Questions
Conclusion
Wall plaster art offers a gorgeous and creative way to dress up any space. With limitless design options from sleek geometrics to fluid organic shapes, it fits any style or budget.
Properly lighting textured plaster artwork highlights mesmerizing shadows and contours. While hiring a pro ensures perfect results, you can also craft beautiful DIY plaster pieces with basic materials and techniques.
With the right inspiration, plaster wall art can bring any room to life with artisanal charm and visual flair. I hope my decor tips have sparked some ideas for your own plaster art masterpiece. Happy creating with Nousdecor!
For more plaster art guides, check out our articles on hanging solutions for plaster walls and uncover the story behind plaster wall art now!