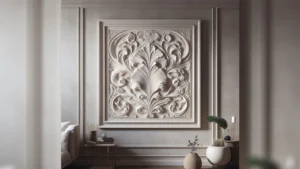
I am Mark Cutler, and I’ve been in the home decor industry for over 10 years and have tried all sorts of wall art to liven up lackluster spaces at Nousdecor. Of all the options, plaster canvas art is one of my favorites for adding visual interest to any room. With the right techniques and inspiration, you can create breathtaking works of art using this versatile medium.
In this comprehensive guide, I’ll share my top tips for making plaster canvas art along with different Plaster Canvas Art Ideas to spark your creativity. You’ll learn how to add depth, dimension, and texture using various plastering methods.
By the end, you’ll have the knowledge and inspiration to craft custom plaster canvas pieces that make a bold statement in your home. Let’s get started!
Key Takeaways
- Plaster canvas is a versatile art medium that allows you to add depth and texture through plaster techniques like scraping, carving, stamping, etc.
- With some simple materials like canvas, plaster, and acrylic paints, you can create abstract art, landscapes, geometric designs, and more.
- Using stencils, molds, and found objects, you can imprint designs and patterns into wet plaster to make one-of-a-kind pieces.
- Finishing techniques like painting, staining, and sanding allow you to add color, sheen, and dimension to take plaster canvas art to the next level.
- Get inspired by the 20+ plaster canvas ideas including oceanscapes, maps, flowers, and modern geometric designs.

Choosing Your Plaster Canvas Art Ideas
The base of your plaster canvas art is an essential consideration. You’ll want a canvas fabric that has an appropriate weave and thickness to hold the plaster properly. Here are some tips for choosing the right canvas for mastering the art of plaster canvas:
- Opt for a medium-weave cotton or poly-cotton blend. Tightly woven canvases won’t grip the plaster well.
- Primed canvas provides a better base for plaster to adhere to than unprimed fabric.
- For larger pieces, choose a 10-12 oz canvas for durability. For smaller pieces, 7-8 oz will suffice.
- Stretch canvas on bars offers more stability than loose canvas. Glue loose edges to prevent ripping.
Take time to prepare and stretch your canvas properly on a frame. Start with quality materials so your plaster has the right foundation.
Helpful Plastering Materials and Tools
In addition to canvas, you’ll need some basic materials and tools for working with plaster:
- Plaster – White plaster of Paris is commonly used for art. It dries quickly and accepts paint well.
- Containers – Plastic buckets, tubs, or trays for mixing plaster. Disposable is preferable.
- Mixing tools – Various trowels, putty knives, and paddles for mixing plaster.
- Applicators – Trowels, putty knives, paint brushes, and rollers for applying plaster.
- Carving tools – Wood and rubber tools for sculpting details.
- Molds – Pre-made or found objects to imprint designs.
- Stencils – Plastic and paper stencils add patterns.
- Drop cloths – Protect your floors and workspace.
- Sandpaper – For smoothing plaster once dry.
Gather these supplies before starting a plaster canvas project for the best results.
Prime Your Canvas
Before applying plaster, it’s important to prime your canvas with gesso or acrylic paint. This gives the plaster something to grip and prevents sinking into the fabric:
- Apply 2-3 coats of gesso with a brush, allowing drying time between coats. Smooth gesso creates a uniform base.
- For added texture, use thick acrylic paint with a pallet knife instead of gesso. Add ridges, peaks, and valleys.
- Lightly sand each gesso/paint layer to remove bumps and excess texture before adding the next coat.
- Allow the primer to fully dry before applying plaster, typically 24 hours. Damp canvas will dilute the plaster.
Priming is a necessary step that gives you a perfectly prepped canvas for plaster. Don’t skip it!
Mixing Plaster for Canvas
Mixing plaster properly is key to working with this medium. Follow my techniques for ideal plaster consistency:
- In a container, measure and add plaster powder. Use a 2:1 ratio of powder to water.
- Slowly pour in water while continuously mixing. Stir out any lumps.
- Aim for a smooth, lump-free consistency like pancake batter. Not too thick or runny.
- For an increased working time, add a plaster retarder according to the package directions.
- Only mix as much plaster as you can work within 45-60 minutes before it starts setting.
- Wash tools right after mixing, and dump excess plaster in the trash before it hardens.
Practice mixing until you get the perfect plaster texture. Too thin and it won’t adhere properly. Too thick and it will be hard to manipulate.
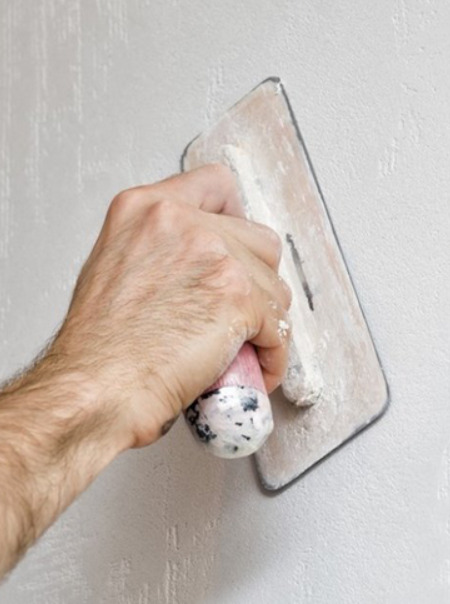
Application Techniques for Plaster Canvas
Here are some of my go-to techniques for applying plaster to canvas:
Smooth, Even Coats
- Use a drywall knife or trowel to cover the canvas in 1/8″ – 1/4” layers.
- Apply plaster by pressing and smoothing in different directions to eliminate ridges.
- Allow each layer to partially dry before adding the next to prevent sinking and cracking.
Textured Imprinting
- Press molds, stencils, or found objects into wet plaster to leave imprints.
- Try lace, burlap, bubble wrap, leaves, seashells, wire mesh, etc.
- Carefully remove the object after partial drying to keep the imprint intact.
Carving/Scraping
- Add thick plaster then carve patterns and shapes once partially dry using wood and rubber tools.
- For thin scraping lines, drag tools through wet plaster to create grooves.
Combing
- Drag a comb, fork, or wire tool through wet plaster to create parallel ridges.
Vary your application techniques to build unique textures and designs. Get creative with your plastering process!
Incorporating Color
Plaster canvas offers the perfect neutral backdrop for vibrant color. Here’s how to add paints, stains, and more:
- Mix dry acrylic pigments right into wet plaster for color throughout.
- Once the plaster is fully dry, apply acrylic paint with a brush or roller over the surface.
- Use an acrylic glazing medium for transparent stained effects over hardened plaster.
- Try fabric dye, watercolors, chalk paint – many media work on plaster!
- Sand areas after staining to reveal design highlights.
- For sheen, apply polyurethane over painted plaster. Satin has a nice glow.
Painting unleashes plaster’s full potential for dynamic designs. Play with layers of color for stunning visual impact.
Inspiring Plaster Canvas Ideas
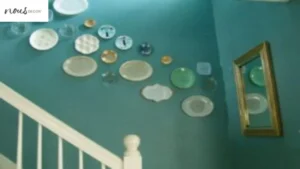
Now that you know the basics, it’s time for the fun part – making your plaster canvas art! Try these creative ideas to get started on hanging art on plaster walls to secure wall hooks for plaster surfaces:
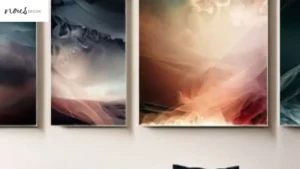
- Abstract Oceanscape – Use trowels, rubber tools, and combs to texture wavy, swirling plaster resembling ocean currents. Paint in shades of blues and greens. Add metallic accents for depth.
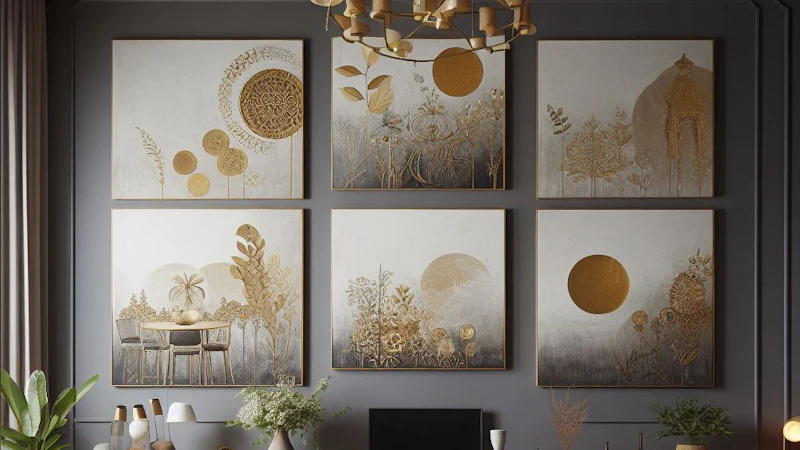
- Gilded Forest Silhouette – Press leaves and ferns into wet plaster to imprint their shape. Paint black when dry, then layer gold acrylic paint on top. Scrape through paint to reveal black silhouettes.
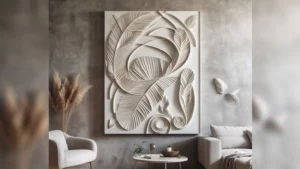
- Dimensional Flower Bouquet – Use plastic flower-shaped molds to imprint designs. Carve circular grooves around flowers with tools. Paint in bright, vibrant colors.
- Southwestern Landscape – Roll on brown and orange paint as a base layer. Use rubber tools to carve zig-zag canyon designs. Paint with blues, purples, and pinks.
- Moroccan Tiled Wall – Apply a thin plaster layer. Press in mosaic tile stencil while wet. Use metallic paints in coordinating colors to accent.
- Galactic Constellations – Flick white paint on black plaster using a brush to create stars. Press in bolts and washers to imprint planets while wet.
- Coastal Map – Spread plaster in a thin, uneven layer for texture. Scratch a rough map design onto the surface with tools. Stain plaster using blue and green.
- Ombre Rainbow – Roll on colored acrylic from top to bottom in one motion to blend rainbow shades. Use a foam roller for an airy texture.
- Geometric Mountain Peaks – Lay wire mesh into wet plaster to imprint geometric lines. Carve and paint plaster in shades of gray, white, and blue.
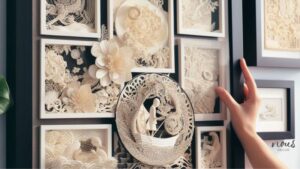
- Botanical Study – Press real leaves and flowers into plaster to make impressions. Use black plaster as a base for crisp details.
Let these springboard ideas ignite your own plaster canvas creativity! The options are limitless.
Key Plaster Canvas Tips
As you venture into canvas wall plaster art images, keep these tips in mind for success:
- Always seal your canvas first for plaster adhesion. Gesso or thick paint does the trick.
- Mix your plaster properly – thin enough to spread but thick enough to hold shapes.
- Work in thin 1/8-1/4” layers and let dry between to prevent cracking/sinking.
- Wet your tools while sculpting to keep the plaster from sticking.
- Imprint objects have the best results in leather-hard plaster – not too wet or dry.
- Smooth with sandpaper before painting for paint adhesion and clean results.
- Seal when finished with polyurethane or acrylic varnish to protect your art.
Follow these tips as you explore plaster canvas for stunning statement pieces!
Frequently Asked Questions
Conclusion
With the right materials and techniques, plaster canvas opens up a whole artistic world of textural possibilities for wall art inspiration for your home. It’s enormously gratifying to see a blank canvas transform as you build up intricate layers of plaster. With the inspiration you’ve gained here, you can craft custom plaster art that infuses any space with artisanal flair.
I hope these tips demystify the plaster process so you can begin your own artistic journey. Approach each piece as a fun experiment, and let the medium guide you to create something beautiful and totally unique.
Just add your imaginative vision, and get ready to be amazed at what you can achieve. Go make some art!