So you’ve taken some incredible photos and now you’re ready to showcase them on your walls. But how do you go about blowing up those photos to create stunning wall décor? Fear not, for I am here to guide you through the process step by step of How To Blow Up Photos For Wall Art.
Choosing the perfect photo is the first crucial step. You want an image that captivates, mesmerizes, and tells a story all on its own. Once you’ve made your selection, it’s time to prepare your photo for printing. This involves ensuring the resolution is high enough and making any necessary adjustments for optimal clarity.
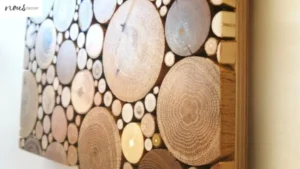
Next comes selecting the appropriate printing method. There are various options available, each with their own unique qualities and advantages. From canvas to acrylics or contemporary metal art pieces, choose the one that best suits your aesthetic vision.
Now it’s time for the magic – enlarging and adjusting the image itself. With advanced software tools at our disposal today, we can enhance colors, sharpen details, and bring out even more beauty in our photographs.
Finally, casing and displaying your wall décor adds that finishing touch of elegance and professionalism. Choose a case that complements both your photo and your living space.
With these Nousdecor expert tips in hand, get ready to transform your favorite photos into breathtaking wall décor that will leave everyone in awe!
Key Takeaways of How To Blow Up Photos For Wall Art
- Choosing the perfect photo is crucial for creating wall décor
- Properly preparing and optimizing the photo is essential for printing
- Selecting the appropriate printing method is important for achieving desired results
- Considerations such as resolution, composition, and casing contribute to the overall impact of the wall décor
Choosing the Right High-quality Photo Enlargement
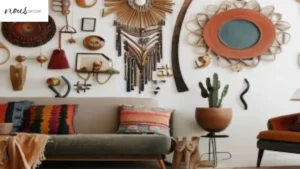
Looking to make a statement with your Home Decor Items? Find the perfect photo that will wow everyone when blown up! When choosing a photo for enlargement, there are two important factors to consider: photo resolution and photo composition.
Photo resolution determines the quality and sharpness of the image when it is upscaled. Make sure to select a high-resolution photo to ensure clear details and vibrant colors. Additionally, think about the composition of the photo.
Look for images with interesting subject matter, balanced elements, and strong visual impact. A well-composed photo will look even more impressive when blown up on your wall.
Now that you have chosen the right photo, let’s move on to preparing it for printing by optimizing its size and format.
Preparing Your Photo Canvases for Printing
To ensure your image is ready for printing, start by resizing and optimizing it for display on a larger scale. Such creative use of canvas in art can be done using various editing techniques to enhance the overall quality and appearance of the camera photo.
Pay attention to the photo resolution while uploading, as a higher resolution will result in a clearer and more detailed result. Additionally, consider cropping the image or adjusting the brightness and contrast to achieve the desired effect.
Here are three important steps to follow when preparing your photo:
- Resize: Use software such as Adobe Photoshop to adjust the dimensions of your photo according to the desired size.
- Enhance: Apply editing techniques like sharpening or noise reduction to improve image clarity.
- Save in Appropriate Format: Save your edited photo in a file format that supports high-quality printing, such as TIFF or JPEG.
By following these steps, you can ensure that your photo is optimized for printing.
Now let’s move on to selecting the appropriate printing method…
Selecting the Appropriate Printing Method Without Losing Quality
When choosing how to print your modern abstract art prints, it’s important to consider the various methods available that can bring your image to life.
There are several techniques you can choose from, such as inkjet, laser, or professional photo labs. Each method has its own advantages and it’s crucial to select the one that best suits your needs.
Additionally, resizing and resolution play a significant role in the quality of your image. Ensure that the resolution of your photo is high enough for the desired size so that it doesn’t appear pixelated or blurry when blown up.
In the next section about enlarging and adjusting the image, we will explore how to make these adjustments effectively without compromising on quality or clarity.
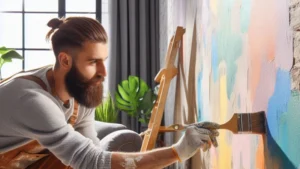
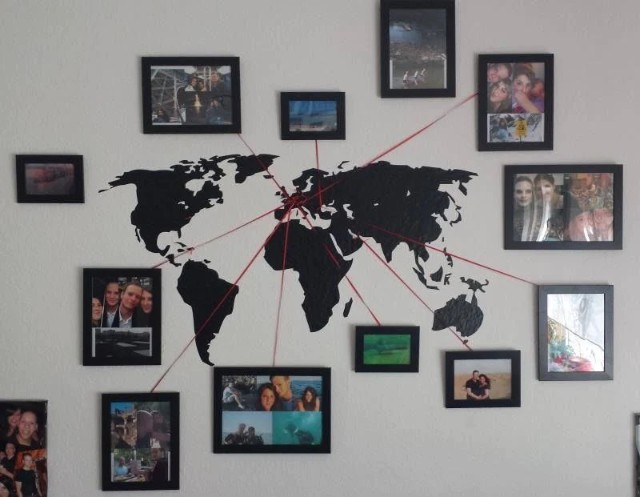
Enlarging and Adjusting the High-resolution Photo Printed Gallery Wall
Make your image come to life by enhancing and resizing it, ensuring that every detail is vivid and captivating. When it comes to enlarging and adjusting your photo for wall décor, there are several resizing options available.
One method is using specialized software or online tools that allow you to increase the size of your image without sacrificing quality. These programs use advanced algorithms to maintain sharpness and clarity while enlarging the photo.
Additionally, you can manually adjust the image settings such as brightness, contrast, and saturation to enhance its overall quality.
By utilizing these resizing options and enhancing image quality, you can create a stunning piece of wall décor that truly stands out.
Now let’s move on to casing and displaying your masterpiece seamlessly into any room decor.

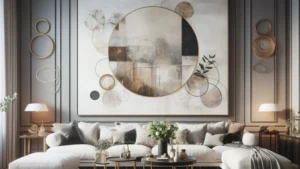
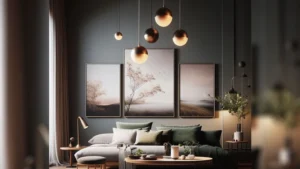
Framing and Displaying Your Wall Art
You can easily showcase your stunning masterpiece by selecting the perfect frame and seamlessly integrating it into any room decor. When it comes to hanging and arranging wall décor, there are a few DIY casing techniques you can use to achieve a professional look.
First, consider the style and color scheme of your room when choosing a case. A sleek black or white case can provide a modern touch, while a rustic wooden case adds warmth and charm.
Next, determine the best placement for your wall décor by considering factors such as eye level, symmetry, and balance within the space.
Finally, use proper hardware and tools to securely hang your artwork on the wall. With these tips in mind, you’ll be able to create an impressive display that enhances your home’s aesthetic appeal.
Plus, you can consider checking out our articles on different kinds of prints for more references such as peacock-inspired art prints or rustic Western art prints!
Frequently Asked Questions
Conclusion
In conclusion, the process of How To Blow Up Photos For Wall Art Decor is a process that allows you to showcase your favorite images in a stunning and captivating way.
By selecting the perfect photo, preparing it for printing, choosing the appropriate printing method, and resizing and adjusting the image, you can create a visually impressive piece of wall décor. Finally, framing and displaying your wall décor with careful consideration of style and placement adds the finishing touch.
With these tips and techniques, you’ll be able to transform your photos into breathtaking wall décor that will leave a lasting impression.