So, you want to create some sculptural wall décor, huh? Well, get ready to unleash your inner Picasso because I’ve got all the tips and tricks you need to turn your plain old walls into stunning masterpieces. Trust me, it’s easier than you think.
In this article, we at Nousdecor are going to dive deep into the world of How To Do Textured Wall Art. From choosing the right materials and tools to exploring different techniques, we’ll leave no stone unturned. Whether you’re a seasoned artist or a novice with a passion for creativity, this guide is here to help you bring your vision to life.
But before we get started, let me just say that creating sculptural wall décor is not for the faint of heart. It takes time, patience, and a whole lot of imagination. But hey, if you’re up for the challenge (and I know you are), then let’s roll up our sleeves and get ready to make some magic happen on those walls!
Key Takeaways of How To Do Textured Wall Art Tutorial
- Choose the right materials and tools for creating sculptural wall décor canvas
- Prepare the wall properly before applying texture
- Explore different texturing techniques for unique effects
- Finish and protect the artwork with sealant and varnish
Step 1: Choosing the Right Materials and Tools For Your DIY Project
When it comes to creating sculptural wall décor canvas, it’s essential to choose the right materials and tools for the job. Choosing appropriate patterns is crucial in achieving the desired effect.
You can experiment with mixed media techniques by combining different patterns such as sand, fabric, or even pieces of nature like leaves or twigs. These elements add depth and interest to your artwork.
As for tools, consider using a palette knife for applying thick layers of pattern, brushes for finer details, and stencils for creating patterns. It’s also important to have a variety of paints and glazes on hand for further enhancement.
If you’re interested in the metallic material, however, check out our article on How To Hang Metal Wall Art now!
Once you’ve gathered all your materials and tools, you can move on to preparing your wall for patterned art by ensuring it’s clean and smooth, ready to showcase your masterpiece seamlessly.
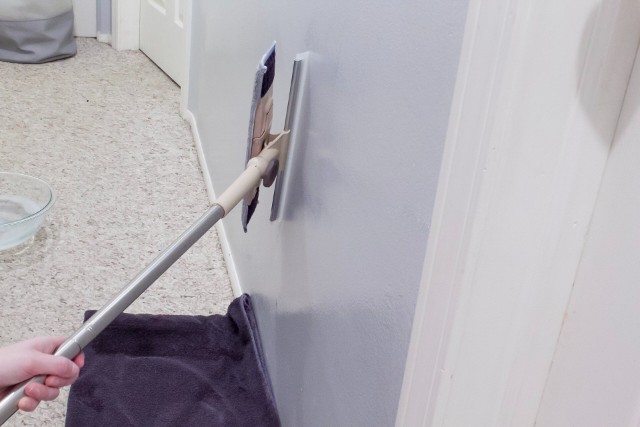
Step 2: Preparing the Wall for To Make Your Own DIY Textured Wall Art
Before you start adding texture to your textured plaster artwork, make sure your drywall mud is properly prepared. Wall preparation is essential for achieving a smooth and professional-looking patterned art.
- Begin by cleaning the wall thoroughly to remove any dirt or dust that could interfere with the adhesion of the materials.
- Next, inspect the surface for any cracks or holes and fill them in using a suitable patching compound.
- Once the repairs are dry, sand down any rough areas to create an even surface.
- Afterwards, it’s important to prime your wall before applying texture. Priming helps seal the wall and provides a better surface for the material to adhere to.
- Choose a primer specifically designed for patterned art projects, as this will enhance the durability and longevity of your artwork.
With your wall cleaned, repaired, and primed, you are now ready to explore different texturing techniques in order to bring your artistic vision to life.
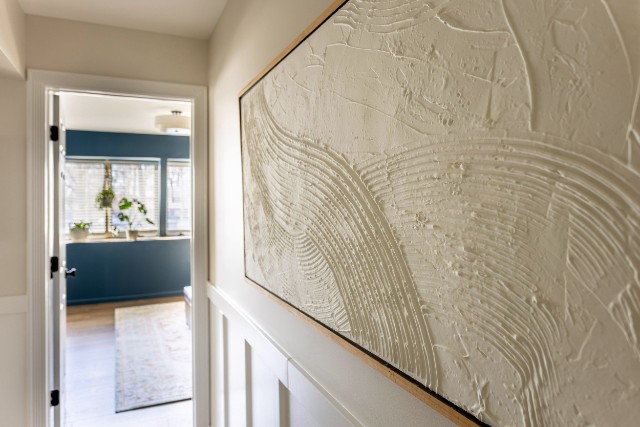
Step 3: Exploring Different Canvas Texturing Joint Compound Techniques
After properly preparing your wall for some unique home decorations, it’s time to delve into the myriad of texturing techniques available to bring your artistic vision to life. Here are some exciting options to consider:
- Venetian plaster: This technique involves applying multiple layers of plaster for a smooth, marble-like finish.
- Stucco: With its rough and grainy appearance, stucco adds depth and dimension to your artwork.
- Spackle: Using spackle creates a raised, patterned effect on your wall that can be enhanced with different tools.
- Rollers: These specialized rollers can create unique designs and patterns in your patterned paint.
- Found objects: Get creative by using unconventional materials like sponges, bubble wrap, or even leaves to add interesting patterns.
By experimenting with these different types of patterned paint and incorporating found objects into your artwork, you can achieve captivating results.
Now let’s explore how adding colors and patterns will further enhance the beauty of your creation.
Step 4: Adding Colors and Patterns to Your Textured Abstract Art Piece
To truly elevate your masterpiece, infusing vibrant hues and intricate patterns will be one of the unique decor ideas with wall art that transform it into a mesmerizing work of art.
Creating three-dimensional effects is a fantastic way to add depth and visual interest to your textured canvas art. You can achieve this by layering different materials such as fabric, string, or beads onto the surface. By strategically placing these elements, you can create shadows and highlights that give the illusion of depth.
Another great technique is incorporating mixed media elements into your artwork. This can include using paint, markers, or even collage materials to add balance and contrast to the piece. Experiment with different Wall Art Color Trends and patterns to find what resonates with your artistic vision.
You can create plaster wall art or see our DIY geometric wall art guide and try pairing them with your textured art for a perfect mix in your space! Adding some stickers with our wall art sticker application guide can work as well!
Now that you have added colors and patterns to your artwork, it’s time to move on to finishing and protecting your made textured art seamlessly.
Step 5: Finishing and Protecting Your Textured Wall Art
Enhance your masterpiece by adding a protective finish that will preserve its mesmerizing appeal. Sealing and varnishing your sculptural wall décor is essential to ensure its longevity and durability. Here are four key steps to consider:
Choose the right sealant: Select a sealant that is compatible with the materials used in your artwork, such as acrylic or oil-based sealants.
Apply multiple coats: Apply thin, even layers of sealant using a brush or roller. Allow each coat to dry completely before applying the next one.
Consider varnishing: Varnish adds an extra layer of protection and can enhance the colors and patterns of your artwork. Opt for gloss, satin, or matte finishes depending on your preference.
Framing and hanging options: Once your artwork is fully sealed and varnished, you can choose to frame it for added elegance or simply hang it directly on the wall using hooks or adhesive strips.
By following these steps, you can ensure that your sculptural wall décor remains beautiful and protected for years to come.
For a more throughout guide about protecting your wall art, check out our article on tips for artwork cleaning!
Frequently Asked Questions
Conclusion
In conclusion, creating sculptural wall décor is an exciting and rewarding artistic endeavor. By choosing the right materials and tools, preparing the wall properly, exploring different texturing techniques, and adding colors and patterns, you can transform your plain walls into captivating masterpieces.
Remember to finish and protect your artwork with sealant and varnish to ensure its longevity and durability. With patience, creativity, and a willingness to experiment, you can unleash your inner artist and bring your artistic vision to life.
So, roll up your sleeves, gather your supplies, and get ready to embark on a sculptural wall décor adventure that will leave you and your guests in awe.
Interested in some nature-inspired moss decor? Check out our articles on creating moss wall art and how moss art lasts now!