Installing roller shades is an easy way to add stylish, functional window coverings to your home. I’m going to show you how you can install them yourself with just a few simple steps and materials.
No need for professional help! It’s an easy project that almost anyone can do in an afternoon or less. With the right tools and planning ahead, it’ll be smooth sailing from start to finish.
Now, together with Nousdecor, let’s get started on How To Install Roller Shades!
Key Takeaways of How To Install Roller Shades
- Accurately measure the width and height of your window opening when selecting mounting brackets.
- Roller shades come in different colors and materials, so consider light control, privacy, and other features when selecting the shade type.
- Proper installation and maintenance will ensure years of comfort and beauty.
- Adding valances and decorative accents can enhance the look of any room and provide additional texture and interest.
Gather the Necessary Materials
Gather up all the materials you’ll need for your roller shades installation – it’s easier than you think! You will need to get a tape measure, a drill and screws, mounting brackets that fit your window dimensions, the roller shade itself and any additional hardware provided with it.
Depending on the type of material used for your roller shades, you may also need tools like pliers or screwdrivers. Make sure to double-check that all of these items are present before starting your project.
Once you have everything in hand, take out the tape measure and find the width and height of your window opening. Measure from one side of the window frame to the other side at both the top and bottom of the window frame.
Then do this again for each side from top to bottom so that you have four measurements: two widths (top & bottom) and two heights (left & right). Write down these measurements as they will be important when selecting mounting brackets.
Now that you know what materials are needed and how to measure your window accurately, it is time to select suitable mounting brackets for your project. Be sure to pick ones that match up with your measurements; otherwise, they won’t fit correctly on the wall or in the window frame!

Measure the Window
Measuring your window is the first step in transforming it into a beautiful space. You’ll need to measure both the width and height of the window opening to determine what size roller shade you should buy.
Start by measuring the width from one side of the window frame to the other, at three separate points: top, middle, and bottom. Write down each measurement and then take an average of them for a more accurate number.
Then measure the height of the window from top to bottom at two different points: left and right sides. Again, take an average of these measurements for accuracy.
When measuring for any kind of blind or shade installation, be sure to use a metal tape measure instead of a cloth one as it will give you more precise readings. Additionally, always round up when taking your measurements; this will ensure that your blinds are not too small for your windows once they are installed.
Finally, note down all measurements on paper in order to avoid confusion when ordering shades online or in-store. This can also help if you decide to compare different types or sizes before selecting one that best fits your needs.
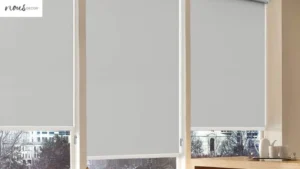
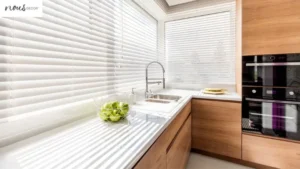
Roller shades come in many colors (see understanding roller shades for more info) and materials so make sure you choose one that complements your existing furnishings as well as providing privacy or light control when needed—selecting the shade type is next on our list!

Select the Shade Type
Now that you’ve taken your measurements, it’s time to select the perfect shade type for your window.
There are several types of roller shades available as practical window treatment solutions on the market today, each with their own unique benefits and drawbacks. To make sure you choose the right one for your needs, consider comparing them side-by-side using this table:
| Shade Type | Benefits | Drawbacks |
|---|---|---|
| Vinyl | Durable Easy to clean Low cost | Limited range of colors Can be prone to tearing if not handled carefully |
| Fabric | Stylish designs High light control options Excellent insulation properties | Prone to fading if exposed too much sunlight |
| Bamboo | Eco-friendly option Unique texture and look | Can be more expensive than other materials |
No matter which roller shade you choose, make sure it meets all your needs before making a purchase. Assess how much light or privacy is needed in the room, as well as any other features like blackout fabric or motorized blinds.
Taking these factors into account will ensure you get the most out of your new roller shades. Once you’ve made your decision, it’s time to cut the shade to size!
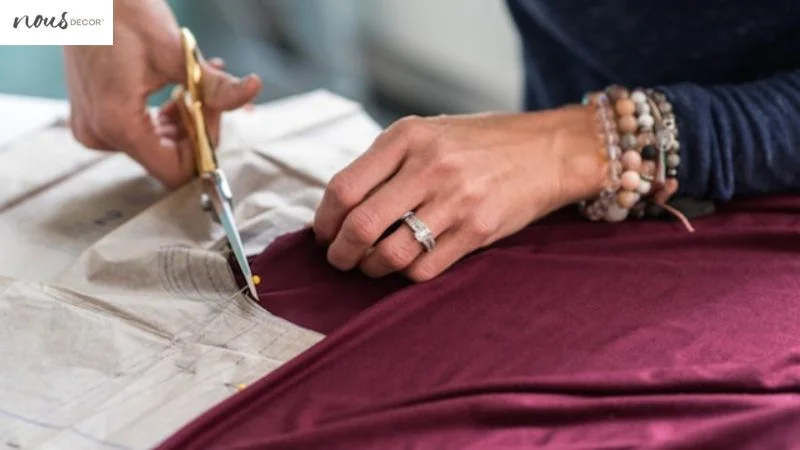
Cut the Shade to Size
Cutting your new shade to size is the final step in creating the perfect window treatment – and it’s so satisfying!
First, you’ll want to measure the exact width of your window frame. Be sure to get an accurate measurement – a few extra millimeters can make all the difference.
Once you have your measurements, grab sharp fabric scissors and carefully cut the shade along the marked line. When cutting, keep in mind that:
- You should always be gentle when pressing down on the fabric
- Pulling or tugging can cause uneven cuts or tears in the material
- Double-check measurements before making any cuts
After you’ve finished cutting, give yourself a pat on the back for completing this important step! Now it’s time to move on to attaching brackets to secure your newly sized roller shade into place – no need for tools here either!
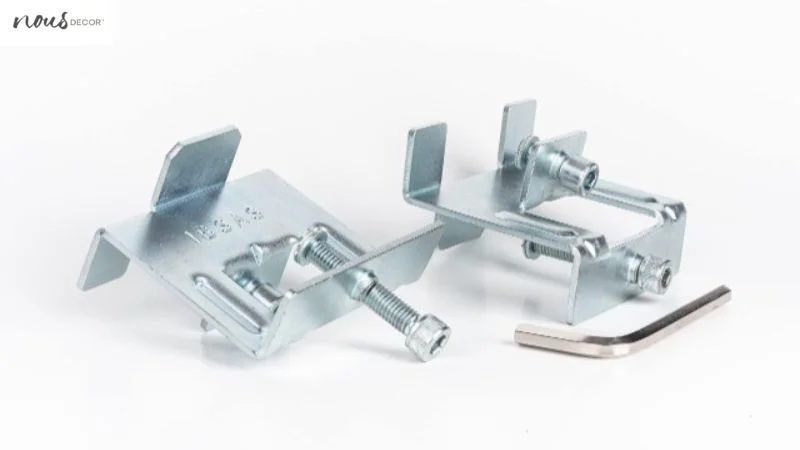
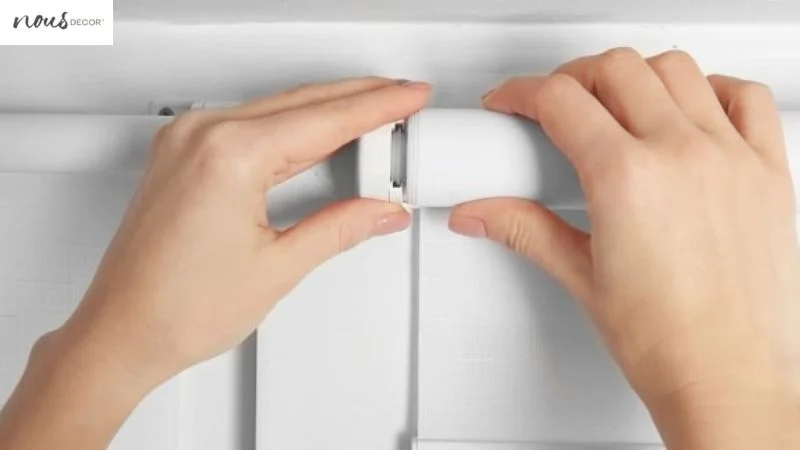
Attach the Brackets
Now it’s time to get your masterpiece hung up! Securely attach the brackets with a few simple steps and watch your window transform before your eyes.
First, measure the width of the bracket to make sure it fits in the gap between the window frame on either side. This will ensure that the roller shade is properly supported and doesn’t droop or sag in the middle.
Next, mark where you want to place each bracket based on your measurements, then use screws or drill anchors to secure them into place.
Finally, be sure to check that each bracket is firmly attached and that all screws are tight so your window covering won’t fall off when raised or lowered! With everything securely in place, it’s time for you to insert the shade into its new home.
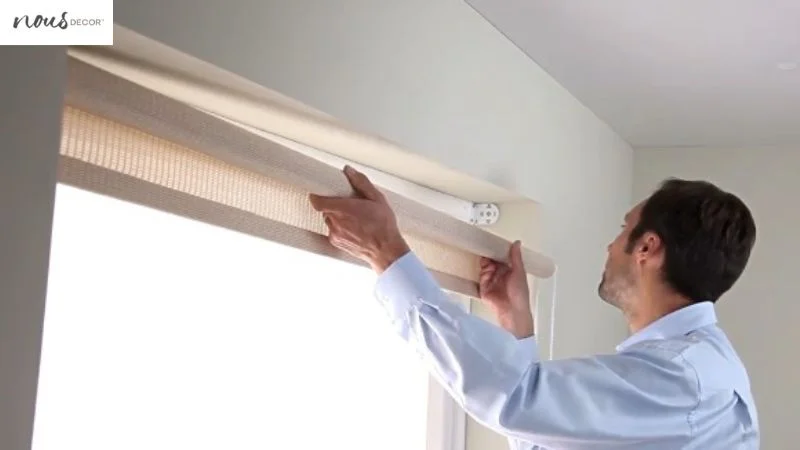
Insert the Shade into the Brackets
Slide your window covering into its new home and get ready to enjoy the transformation! With the brackets already attached, it’s time to insert the roller shade into them. Here are three easy steps:
- Make sure the top of the shade is facing outwards and lined up with the edge of your window frame.
- Insert each side of the shade into their respective bracket slots.
- Check that they are securely in place by gently tugging on each side of the shade fabric.
Once you’ve confirmed that everything is installed properly, you can take a step back and admire your handiwork!
Your windows now have a stylish upgrade that will be an elegant addition to any room in your house for years to come – no need for hammering or painting, just simple installation!
Secure the Shade to the Brackets
Securely affixing the shade to the brackets is the final step before you can enjoy your updated window treatment.
Use a screwdriver to attach the roller tube at each end of the bracket, being careful not to overtighten. If you have a double-bracket installation, attach two screws in each bracket for extra security.
To open or close your shades, pull gently on the beaded chain or use a wand that clips onto one side of the shade. Make sure that it’s securely attached and does not come loose when opened or closed.
To adjust tension on a spring roller shade, locate where either end of the spring is connected to its bracket, then press down firmly with your thumb and index finger while releasing tension from both sides simultaneously.
You may need to repeat this process multiple times until you reach your desired amount of tension. This allows for smooth operation without any snags or stuck spots during opening and closing of your shades.
After adjusting all necessary tensions, it’s time to sit back and enjoy your new Roller Shades! With proper installation and maintenance, they will provide years of comfort and beauty for any room in your home.
Now that everything is installed correctly, you can rest assured knowing that these shades will continue to operate smoothly for many years to come – no more sticking or snagging!
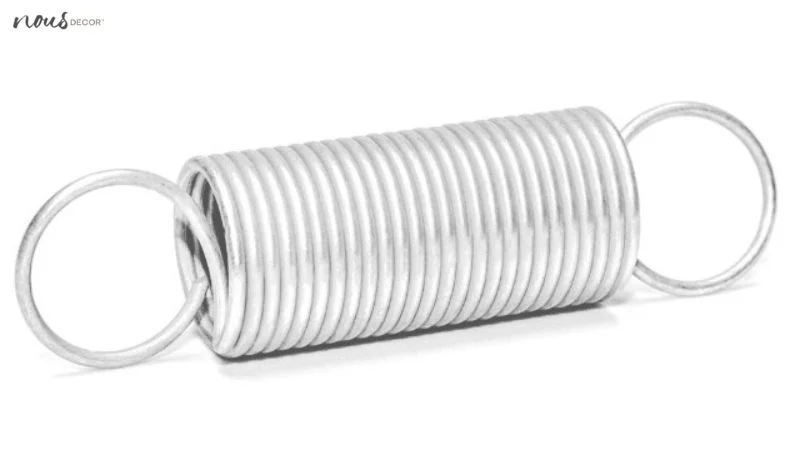
Adjust the Spring Tensions
Gently adjust the spring tensions with your thumb and index finger, releasing tension from both sides simultaneously to ensure a smooth operation without any snags.
Adjusting the spring tensions will help you control the shade when raising and lowering it. Here are some tips for adjusting your roller shades:
- Check that all brackets and screws are properly secured.
- Make sure that the weight of the shade is evenly distributed between all brackets.
- Ensure that there’s no slack or tightness in fabric as it rolls up or down.
Once you’ve adjusted all of these components, your roller shades should be able to raise and lower smoothly. From here, you’re ready to add valance or decorative accents which can really enhance the look of your window covering!
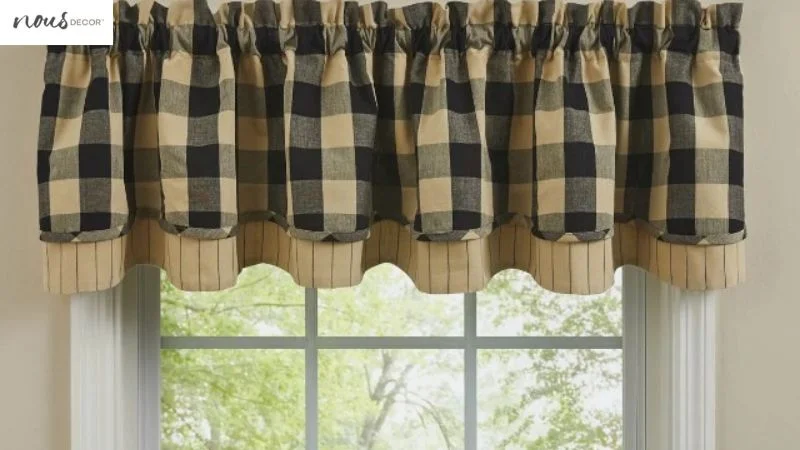
Add Valance or Decorative Accents
To finish off your window treatments, why not add some valance or decorative accents to really make it pop? Roller shades are an ideal choice for adding a unique touch to any room.
Valances come in many different styles, and can be used with roller shades for a more luxurious look. They can also be customized in a variety of fabrics and colors, so you can find the perfect one that will match your home’s décor.
Not only do they add beauty to the window but they also act as insulation from outside temperatures and help keep the window draft free.
Stylish interior accents such as tassels, tiebacks, medallions, finials or trims may also be used with roller shades to complete the look. These items provide additional texture and interest when hung with your roller shade.
Whether you choose a pair of coordinating tassels or tiebacks or use an intricate medallion design, these accessories will add a beautiful finishing touch to any room in your home.
Now that you have added these special touches to your windows it is time to move onto the next step: can I install roller shades myself? Installing new window treatments is easier than ever before! With just a few simple steps you’ll have stylish new popular window treatment choices up in no time at all.
Can I install roller shades myself?
If you’re feeling adventurous, why not try your hand at installing roller shades yourself? It’s actually surprisingly easy to do, and doesn’t require any special tools or expertise. All it takes is some time and a few simple instructions.
The first step is to measure the window accurately before purchasing the roller shade kit. Once you have the kit in hand, follow the instructions carefully – using a level and measuring tape will ensure that your roller shade hangs evenly across the window.
Finally, attach the mounting brackets properly so that they are securely fastened to both sides of the wall.
Installing roller shades yourself can save you money on installation costs as well as give you a sense of pride knowing that you completed this project yourself! There are many helpful tutorials online with detailed instructions for all types of stylish window coverings including roller shades. If this type of DIY project appeals to you, consider giving it a try!
Roller shades can be an attractive addition to any home or office space, but before taking on this task make sure that you feel comfortable doing it yourself. Take your time and ask for help if needed; there’s no shame in enlisting an experienced friend or family member when tackling complicated projects like this one!
Frequently Asked Questions
Conclusion
Yes, you can definitely install roller shades yourself! It’s a fairly straightforward process if you have the right materials and take your time. With some patience and attention to detail, you’ll be able to get the job done in no time. Plus, it’s way cheaper than paying someone else to do it for you.
So don’t be intimidated about learning How To Install Roller Shades, just go ahead and give it a try! You won’t regret it once you see how great your room looks with its new roller shades.