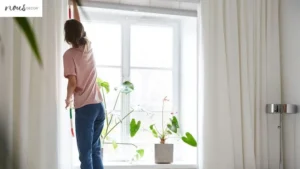
Roller shades are a great way to add style and functionality to any room. But, when something goes wrong with them, it can be difficult to know how to fix them yourself.
In this article, we at Nousdecor will explain the steps to How To Fix Roller Shades quickly and easily. From diagnosing the issue and removing the shade all the way through adjusting the tension or replacing a broken spring – we’ve got you covered!
With our advice, you’ll soon have your rolling shades looking good as new.
Key Takeaways of How To Fix Roller Shades
- Adjusting the tension is crucial for smooth operation of window coverings
- Replacing a broken spring may be necessary for window treatments that don’t operate smoothly
- Test the roller shade by re-installing and rolling up and down to ensure successful replacement
- Check all parts for security and integrity before reinstalling the roller shade
Diagnosing the Common Problems Regarding the Roller Mechanism
See if you can identify the problem with your roller shade by checking out these tips.
- First, make sure that it is installed properly – the headrail should be level and parallel to the window frame.
- Next, examine the rolling shade itself for any signs of wear or tear, such as frayed edges or holes in the fabric.
- Finally, check for any obstructions preventing it from rolling up and down – this could range from jammed cords to dirt and debris on the shade’s surface.
- If all else fails, try removing the rolling shade and inspecting its internal components for signs of damage or malfunctioning parts.
It may be necessary to remove your rolling shade if all other attempts at fixing it have failed. Before doing so however, consult your product manual for specific instructions on how to do so safely without damaging its components.
Be sure to also take note of where each part goes when reassembling it later on – a little bit of organization beforehand will go a long way! Additionally, gather all tools and supplies you’ll need ahead of time; having everything ready makes breaking down and rebuilding much easier.
Once you’ve removed your rolling shade completely from its frame, inspect each component carefully for any worn parts or loose connections that could be causing problems with operation. Replace any damaged pieces with new ones that are compatible with your product model – this ensures optimal performance when reassembling later on.
With everything in place, you’re now ready to begin putting your roller shades overview back together again! Do keep understanding roll shade variations as well as these are helpful knowledge!
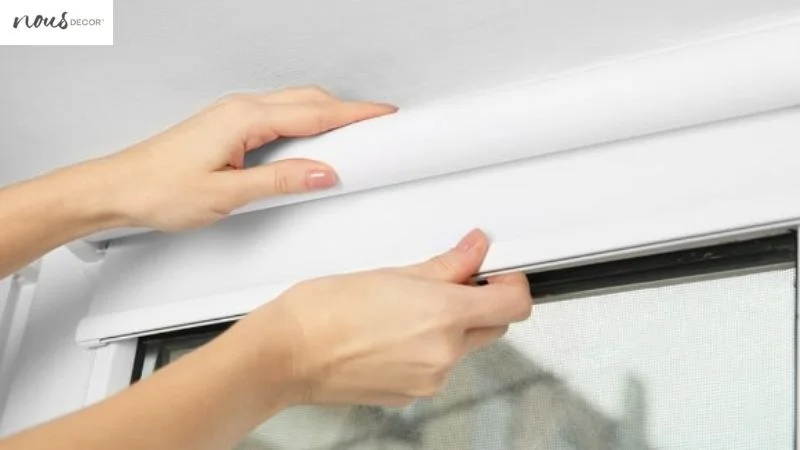
Removing the Roller Blind
To get rid of your roller shade, you’ll need to take it down. Before you start, make sure that the rolling shade is completely closed. You’ll need:
- A flathead screwdriver
- A ladder or step stool
- A pair of scissors
- A friend to help for heavier shades
First, take out the screws in each bracket holding the rolling shade in place. If the brackets are stuck, use a flathead screwdriver to loosen them up. Once they’re removed and set aside, you can have your friend help lift off the shade if it’s heavy or large enough.
Carefully lower it onto a table or workbench so you don’t damage it. Then cut through any strings that are still attached to hold the rollers in its tube shape before disposing of the shade properly.
Fix Window Shades Cord
Replacing the cord on your rolling blinds is a breeze is one of the attractive ways to dress windows, so let’s get to it!
First, you’ll need to find the broken part and then remove the retainer. To do this you’ll want to gently push in on each side of the retainer while pulling away from the shade itself. Be sure that you don’t pull too hard or else you could cause further damage.
Once that’s done, cut off any excess thread that may be left behind and then tie a knot at both ends of your new cord. You’ll want to make sure that both knots are securely in place before you move onto the next step or your shade would be cordless.
Next, attach one end of the new one into its respective channel within the rolling shade tube and then feed it through until it reaches the other side. It’s important not to over tighten as this can put unnecessary strain on your cords leading them to break more quickly than if they were just lightly secured in place.
Then simply repeat with your other end and ensure both sides are secure before moving onto replacing your retainer piece.
Now all that’s left is for you to replace your retainer piece and move onto putting back up your newly repaired rolling shade! With just a few simple steps you’ve successfully replaced and tightened up those old worn-out wires giving new life back into your beloved window treatments!
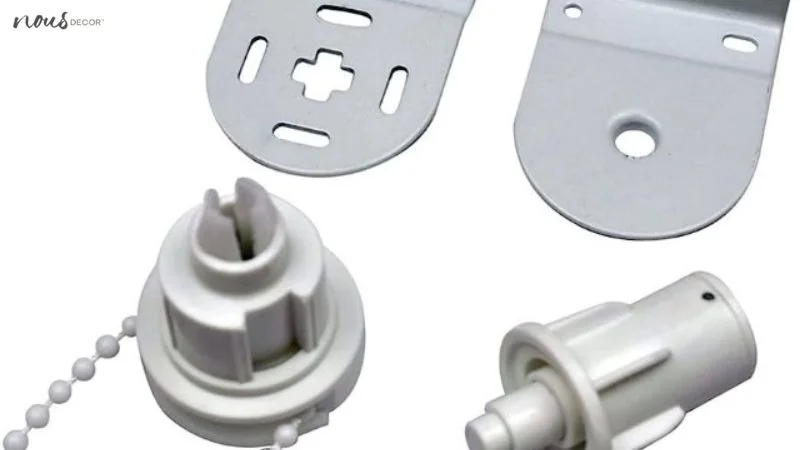
Replacing the Retainer
Now all that’s left is for you to put the finishing touches on your rolling shade repair by replacing the retainer piece. To do this, first make sure you have a replacement retainer piece. You can buy a universal retainer from most hardware stores or online retailers.
Once you have the part in hand, remove the existing retainer and slide in the new one. Make sure it’s securely snapped into place and that it’s aligned with the rest of your window covering components before moving on to replacing any damaged fabric.
Replacing a retainer isn’t difficult but it does require some care as even minor misalignment can cause your rolling blind not to work properly. If possible, enlist an extra pair of hands when doing this job as having another person hold things steady while you replace the part will help ensure everything stays perfectly aligned throughout installation.
Once you’ve secured the new part, confirm that it works by testing out your window treatment system.
With a secure and properly aligned retainer installed with our installing roller shades made easy guide, all that remains is to replace any damaged fabric so your finished product looks perfect again!
Be sure to follow manufacturer instructions for best results—especially if working with specialty fabrics like blackout or light filtering materials—and take special care around hemming and stitched areas as these may need additional attention during repairs or replacements.
Replacing Damaged Fabric
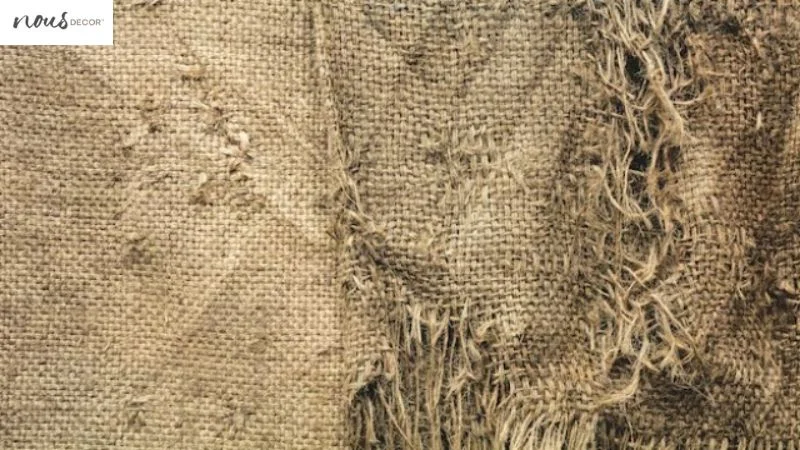
Finally, to complete the restoration of your window treatments, any damaged fabric must be restored.
If you find that your roller shade has frayed or torn fabric, it may need to be replaced. Fortunately, this is an easy task and should only take a few minutes. Before beginning, make sure all tools are in arm’s reach and that you have a replacement fabric for the rolling blind.
Begin by detaching the rolling shade from its mount on the wall or window frame. Slide out the fabric tube from one end of the rolling blind and place it face down on a flat surface such as a table or counter top.
Carefully peel off any old or damaged fabric from around the tube until all remnants are removed and replaced with new material.
| Fabric | Application |
|---|---|
| Plastic-coated polyester (PVC) | Ideal for bathrooms and other high moisture areas due to its durability and water resistance |
| Cotton/polyester blend | Offers more variety in terms of colors and patterns; better privacy than PVC but not as durable against humidity/moisture |
| Woolen/felt materials | Provides both warmth during cold months and insulation during warmer months; not suitable for humid environments due to staining potential |
Once you have cut new pieces of fabric according to size requirements, attach them securely to each side of the tube using ratchet, glue or tape if necessary. From there, simply slide the now covered tube back into its proper location inside the rolling blind casing before reattaching it to its original mount on either wall or window frame.
Don’t forget ensuring correct size for roller shades is essential as well!
With these steps completed your newly restored rolling blinds can be returned to their former glory! Time now to adjust the clutch mechanism so they operate smoothly again…
Adjusting the Clutch Mechanism
Now that the fabric has been replaced, you’ll need to adjust the clutch mechanism so your window treatments operate smoothly again.
The clutch mechanism is what controls how much tension is placed on the rolling blind when it’s being raised or lowered. In order to adjust it correctly, you’ll need to locate the small adjusting wheel located near where the fabric connects to the roller bar.
This wheel will allow you to adjust the tension of your window treatment by turning it in either direction. Once adjusted properly, your window treatment should operate as expected with no additional adjustments needed.
You can also make minor adjustments to further fine tune how much tension is applied by using a flat-head screwdriver in one of two places: at the top of the blind or near where rope connects to chain pulley at bottom of blind.
If you adjust too far and run into resistance, simply turn back in opposite direction until desired results are achieved. Be sure not keep any excess tension on chains as this could cause premature wear and tear over time.
If all else fails, consider searching online for specific instructions on how to set up and/or replace parts for your particular model of rolling blind as these can vary from one brand or type to another.
With some patience and careful adjustment, your shades should be working smoothly again soon! Now that you’ve adjusted the clutch mechanism, it’s time to move onto adjusting tension which will ensure optimal performance from your window treatments moving forward.
Adjusting the Tension
To ensure that your window treatments operate smoothly, it’s important to adjust the tension correctly. The tension adjustment controls how much effort is required to raise and lower the shade. Here are some tips for adjusting the tension:
- Make sure you have a flat surface and a ladder or step stool so you can easily reach the rolling blind headrail.
- Unroll the shade halfway and then mark off how far you need to adjust the tension with a pen or pencil on each side of the headrail.
- Use an adjustable wrench or screwdriver to loosen or tighten both sides of the tensioner according to your markings until it feels right when lifting and lowering your rolling blind manually.
- Test out your adjustments by rolling up and down several times before securing the end caps back in place with screws, if applicable.
Adjusting window blinds can be tricky but following these steps will help you make sure they’re properly adjusted so that they move up and down smoothly without getting stuck or requiring too much effort from you!
Moving forward, we’ll discuss replacing a broken spring which is often necessary if there is difficulty raising or lowering your window treatments.
Replacing a Broken Spring
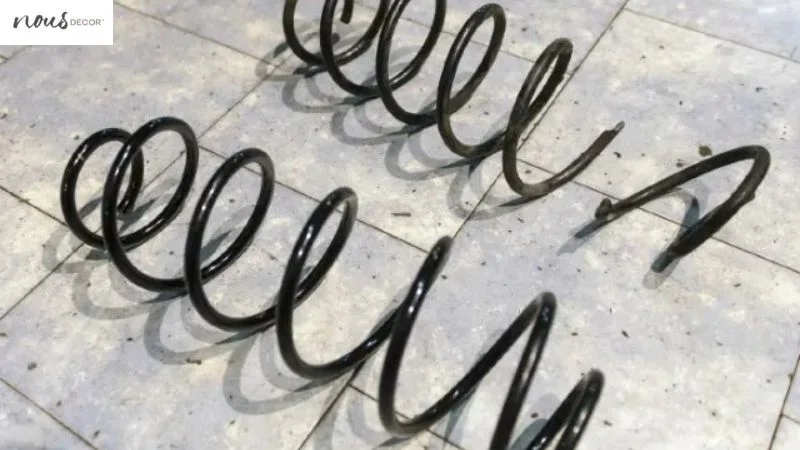
If your window treatments aren’t operating as smoothly as they should, it’s likely time to replace the broken spring. To do this, you’ll need to remove the rolling shade from its brackets and locate the broken spring at the end of the roller. Replace it with a new one that is compatible with your particular type of chic home furnishings.
Make sure to loop each end of the spring through its designated hole in order for it to function properly when installed.
Installing a new spring requires some effort. First, thread one end of the spring into its respective hole on one side of the roller tube. Then wrap it around itself once before looping it back through and securing it with a pair of pliers or vice grips. Next, repeat this process with the other end until both ends are securely attached to their respective holes.
Once complete, test out your work by re-installing and rolling up and down your rolling blind several times – if everything works well then you’ve successfully replaced your broken spring! Now that you have your springs functioning correctly again, you can move on to adjusting your window treatment for optimal operation.
Adjusting the Roller
Once you’ve replaced the broken spring, adjusting the roller is essential for smooth operation. To do this, check that it turns easily by hand. If it’s too tight, loosen each end of the axle a little until it rotates freely.
Make sure both ends are turned an equal amount to keep the shade level. If there’s still too much resistance or if it won’t coil roll the shade up clockwise evenly, you may need to adjust its brakes. This can be done by loosening or tightening two screws on either side of the roller tube. Just make sure not to overtighten them.
The next step is to ensure that the fabric fits snugly in its brackets at each end of the roller tube. Gently tug on it and see if any slack appears; if so, tighten one or both wire locks until it’s taut between them.
You may need to use pliers for this process and be sure not to pull too hard as this could damage your shade material. Lastly, check that all parts are secure and intact before reinstalling your rolling blind into its window frame or bracket holder—it should now operate perfectly!
Reinstalling the Rolling Shade
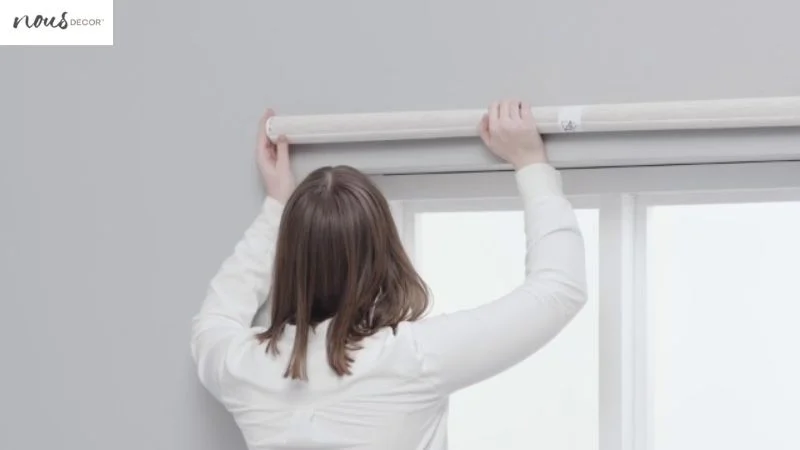
Finally, it’s time to reinstall your newly repaired rolling blind and bask in the glory of a job well done! To ensure that everything is properly back in place, follow these steps:
- Remove any dirt or debris from the surface of the window frame.
- Use a damp cloth to wipe away dust and fingerprints.
- Vacuum up any stubborn bits with an upholstery attachment.
- Cut off any excess fabric on the bottom of the shade.
- Measure twice before cutting to make sure you don’t cut too much or too little (see accurate measurement for roller shades).
- Pay attention to how tight you pull when trimming so that you don’t compromise the tension of the roller mechanism.
- Install brackets onto either side of the window frame at least 1/2 inch apart from each other and make sure they are level with one another.
- Make sure that they’re placed far enough away from walls or furniture so that there’s ample room for movement as you raise and lower your blinds.
- Securely attach them using appropriate hardware such as screws and washers designed specifically for this purpose.
Now your attractive window cover options should be ready to go! With just a few tools, some patience, and careful attention to detail, you can have beautiful working rolling blinds throughout your home again in no time!
For more detailed guide, consider visiting our article on quick and simple roller shade setup!
Frequently Asked Questions
Conclusion
Fixing rolling blinds isn’t as hard as you might think. With patience and the right tools, you can get your rolling blind back in working order in no time! It may take a little time to diagnose the issue, but once you know what needs to be done, the repair process is relatively straightforward.
Whether it’s replacing a broken spring or adjusting tension, with some effort and knowledge, you’ll have your rolling blind looking good as new.