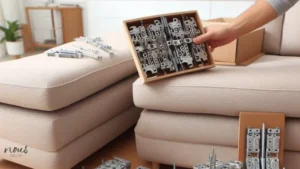
Leather sofas are a luxurious addition to any home. Unfortunately, they don’t last forever and will often require repair at some point. With the right tools and materials, you can learn how to fix small scratches and tears as well as larger holes and peeling.
In this Nousdecor article, I’ll walk you through step-by-step instructions for Repairing A Leather Sofa. So read on and together we shall keep your leather couch sustained for eternity!
Key Takeaways
- Reasons for peeling on a leather couch include exposure to heat and humidity, incorrect cleaning techniques, and mechanical issues.
- To repair a leather sofa, it is important to examine and assess the damage by identifying the cause of peeling and assessing the extent of the damage.
- Cleaning the couch involves using a damp cloth for initial cleaning, applying a leather furniture cleaner to remove dirt and buildup, and drying the sofa with a separate cloth.
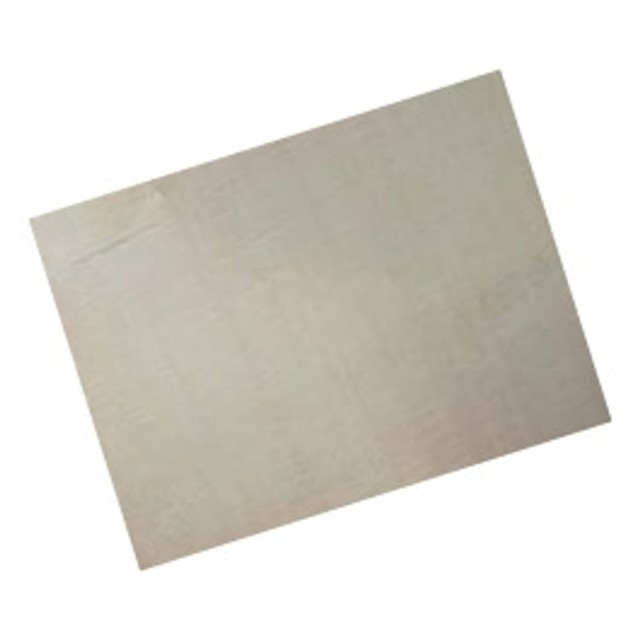
- Preparation for repair includes drying off the sofa completely and using a lint-free cotton fabric as backing material for patches.
Steps for Repairing A Leather Sofa
I’m here to talk about the best way to repair a leather sofa.
The process involves assessing and preparing the area, trimming the leather around the damaged area, inserting a sub-patch behind the leather, applying glue and sub-patching it together, then filling in any remaining holes with heavy filler.
It’s important to take your time when tackling this project to ensure that you get excellent results. Unless you have water marks on your couch, check out our article on how to remove water marks from fabric sofa now!
Step 1: Assess and Prepare
Before beginning repairs, you’ll need to assess and prepare the leather sofa.
- First, examine the entire surface for any rips or tears that require patching.
- Second, check for loose material or broken stitching that needs re-attaching.
- Lastly, look for discoloration or fading areas that may need to be dyed.
All of these issues must be addressed before moving on to the next step.
Once you’ve determined the condition of your furniture, clean it with a lightly dampened cloth to remove any dirt and dust particles from the surface. This will help ensure an even application when applying dye or glue during repair. The final step is to trim away any excess leather around the damaged area so it can be patched seamlessly into place.
With all these preparations complete, you’re ready to start restoring your beloved sofa! Unless your sofa is suffering from fleas then you should check out our article on how to eliminate fleas from your sofa now!
Step 2: Trim The Area
Once you’ve assessed the furniture, it’s time to trim away any excess leather around the damaged area. Before beginning, make sure your tools are sharp and clean. A sharp blade is essential for a neat cut.
Use scissors or an X-Acto knife to make small incisions along the edges of the tear or hole. Focus on making smooth lines that follow the existing seam pattern of your sofa. This will help ensure that when you add a patch, it will blend seamlessly with its surroundings. Once finished trimming, be sure to clean up any debris and remove any stray threads from the area.
Now you’re ready to insert a sub-patch behind the leather, strengthening and reinforcing its structure from within. If there’s wine stain on your sofa, however, check out our tips for wine stain removal now!
Step 3: Insert Sub-Patch Behind The Leather
Inserting a sub-patch behind the damaged area strengthens and reinforces its structure, helping it blend in with surrounding fabric.
To do this, I start by cutting a piece of the sub-patch material of an appropriate size to fit the hole or tear. After that, I place the patch beneath the leather so that it fits snugly between the backing and leather. Then I use a hammer and tack strips to secure it in place.
Once secured, I then glue over the patch with an adhesive designed specifically for use with leather. This ensures a strong seal so that no moisture or dirt can make its way into the repair area.
The result is a seamless repair job that blends nicely with its surroundings. With my sub-patch now securely in place, I’m ready to move on to gluing down any loose fibers around my repair area.
If there are some molds on the sofa, however, check out our article on getting rid of mold on sofa instead!
Step 4: Sub-Patch and Glue
Now that you have inserted a sub-patch, it’s time to start gluing down any loose fibers around the repair area. To do this, grab a bottle of leather glue and apply it to the backside of the leather in a thin layer. Then place the sub-patch onto the glued area and press down firmly with your fingers.
| Type of Glue | Area Applied |
|---|---|
| Leather Glue | Backside of Leather |
| Sub-Patch | Glued Area |
Once the glue is dry, use a damp cloth to remove any excess glue from both sides and ensure that no sticking or fraying occurs. Finally, wipe off any residue with another clean cloth before moving on to applying heavy filler.
And if there are some chocolate stains on your leather couch, check out our guide on getting chocolate off a sofa now!
Step 5: Apply Heavy Filler
Apply a heavy filler to the damaged area to provide cushioning and support. You’ll need to ensure that you choose a filler that is specifically designed for use with leather, as other fillers can damage the material or cause discoloration.
Apply the heavy filler using an appropriate tool, such as a putty knife or spatula, taking care not to apply too much pressure. Smooth out any bumps or ridges with your finger before it has completely dried.
Allow the heavy filler to dry completely; this could take several hours depending on how thickly you applied it. Once dried, move on to filling and drying for the next step in repairing your leather sofa.
Step 6: Filler and Drying
Once the filler is dry, you’ll need to fill and dry the area to complete the repair. I recommend using a thin layer of filler in order to make sure it’s even with the surrounding material. Once that’s done, leave it for at least two hours before sanding it down with a medium-grit paper.
| Time | Material Used | Results |
|---|---|---|
| 2 hrs | Thin Layer Filler | Even Surface |
| 10 min | Medium Grit Paper | Smooth Finish |
It’s important not to rush through this process, as you want to ensure that you have an even base before applying colourant. Without this step, your repair may look uneven or lumpy when finished. Sanding also helps prevent any bubbling or peeling later on due to moisture and humidity changes.
Transition into the next section without saying ‘step’ – Colouring leather requires specific colourants so be sure to select one based on your sofa’s needs.
Colourant Application
Choosing the right colourant for your furniture piece is essential for a successful repair, so make sure to select one that meets your needs. Once you have identified the ideal colourant, it’s time to apply it to the leather surface.
Start by cleaning the area with a slightly damp cloth and then allow it to dry completely. Next, use an applicator sponge or brush to carefully apply the colourant in thin layers until you achieve the desired hue.
Use a soft cloth or brush to blend in each layer of colourant until you reach your desired shade. Make sure that you evenly spread out any areas of discoloration or dullness from prior damage before applying additional coats of colourant. Take care not to overwork the surface as this could cause further damage and affect its finish.
With patience and skill, you can restore your leather sofa back to its former glory. When finished, allow ample time for drying before moving on with preparation of small scratches and tears.
How do you prepare Small Scratches and Tears
To repair small scratches and tears in your leather sofa, you’ll need some specialized tools.
A leather repair kit is a great place to start, as it contains all the materials you need to fix minor damage. If you don’t have one of these kits, you’ll need a piece of fine-grit sandpaper and a leather dye or conditioner.
Start by lightly sanding the affected area with the sandpaper, taking care not to rub too hard or over-sand. This will remove any dirt or dust that might be causing additional wear and tear on the leather.
Next, use a cloth to apply a thin layer of dye or conditioner over the scratched area; this will help restore its natural color and texture. Finally, buff with a clean cloth to give it an even finish.
With proper care and regular maintenance, your leather sofa should look good for years to come! Taking proper precautions when cleaning spills and avoiding contact with sharp objects can help prevent any further damage from occurring.
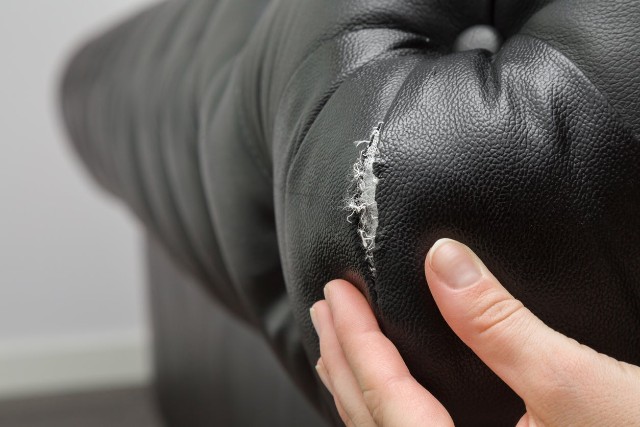
To repair larger tears and holes in your leather sofa, however, it requires more complex methods than those used for small scratches and tears.

How to fix Larger Tears and Holes
Now that we’ve addressed small scratches and tears, it’s time to discuss how to fix larger tears and holes in a leather sofa. Here are three steps you should take:
- Assess the damage – Larger tears and holes require more attention than small scratches and tears. Take stock of the full extent of the damage before attempting any repairs.
- Purchase repair materials – Depending on the severity of the hole or tear, you will likely need a leather patch, some vinyl adhesive, sandpaper, an awl (or needle) and thread if you plan to sew it closed.
- Replace or repair – If possible, use a replacement piece of leather for larger damages like rips or holes. Alternatively, you can sew the edges together using an awl and heavy-duty thread if there is enough material intact to do so. Afterward, apply vinyl adhesive to reseal and secure all patched areas so they don’t come undone over time.
No matter which option you choose – replacing or repairing – always rub sandpaper over damaged areas until smooth after drying time has elapsed; this helps create a more cohesive look once finished with repairs.
As long as you assess for damage accurately and purchase quality materials from your local hardware store or craft supply outlet, your leather sofa should be as good as new in no time! Now let’s talk about fixing peeling issues…
How to fix leather couch is peeling
If your couch is peeling, you’ll need to take action quickly to prevent further damage.
Peeling can occur due to a few different reasons: exposure to heat and humidity, or a mechanical issue such as incorrect cleaning techniques. Examining the affected area can help you identify what caused the leather to peel in the first place.
To start, clean the couch with a damp cloth, followed by an application of a cleaner specifically made for leather furniture. This will remove any dirt that may have built up on the surface and prep it for repair. After cleaning, dry off the sofa with a separate cloth.
| Step | Details | Materials Needed |
|---|---|---|
| Cleaning | Use a damp cloth followed by an application of leather furniture cleaner | Damp cloth & Leather Furniture Cleaner |
| Preparation for Repair | Dry off sofa with separate cloth and use lint-free cotton fabric as backing material for patches | Separate Cloth & Lint-Free Cotton Fabric |
| Applying Patches/Colorant | Cut patches from lint-free cotton fabric and apply leather colorant or dye | Leather Colorant/Dye & Scissors |
Once your sofa has been cleaned and dried, it’s time to fix any areas that are peeling. You can do this by cutting patches from lint-free cotton fabric and applying them over any areas where there is peeling or flaking leather – make sure they are of equal size so that when applied they look uniform in shape and texture.
If necessary, add some extra color back into your couch by using either a colorless sealer or applying some leather colorant/dye over top of the patch(es). Let this sit overnight so that it adheres properly before using again.
Patches should be applied firmly but gently so as not to cause any additional damage; press down each side evenly until all sides have been secured then leave overnight for best results. With these steps taken care of, your couch should be looking good as new in no time!
Now that you’ve cleaned your couch, it’s time to put it in place. But doing such could encounter a big problem of carrying it through narrow spaces. In that case, check out our article on How To Get A Sofa Through A Tight Space now if you ever run into such problem!
Frequently Asked Questions
Conclusion
Repairing a leather sofa isn’t as hard as it may seem. With the right tools and a bit of patience, you can make your couch look good as new in no time.
Small scratches and tears can be easily fixed with leather repair kits, while larger tears and holes require more intensive repairs. Finally, if your leather couch is peeling, applying a protective finish will help keep it looking great for years to come.
So don’t hesitate – take some time to give your sofa the TLC it deserves! However, if your leather has no hope left of being saved, you should try our sofa disposal tips and shop from one of our best couches for home now!