Installing pleated shades can be a daunting task, but it doesn’t have to be. With the right tools and supplies, you’ll be able to get the job done quickly and easily. I’m here to show you how to install pleated shades in a few easy steps.
So grab your materials, roll up your sleeves, and let’s get started together with us as Nousdecor!
Key Takeaways of How To Install Pleated Shades
- Measure carefully and note down measurements for reference, accounting for additional hardware and deciding between inside or outside mount options.
- Secure brackets firmly with a drill and screws, and attach shade to brackets, testing operation before installing valance.
- Adjust tension as needed using adjustment screws located under the valance, checking for evenness and readjusting if necessary.
- Maintain shades by occasional dusting and cleaning, checking for loose threads or strings, and ensuring secure fastening and smooth movement. Enjoy added privacy, insulation, and style for years to come with properly installed pleated shades.
Gather the Necessary Tools and Materials
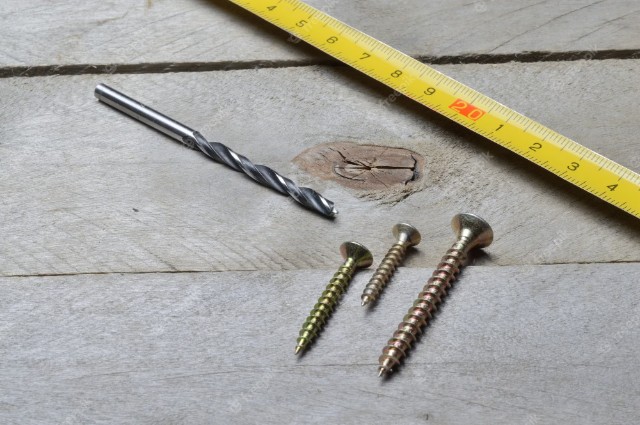
Gather all the tools and materials you’ll need, like a tape measure, drill, and screws; you don’t want to be caught without something halfway through the job! Pleated shades are relatively easy to install. You will also need a pencil or marker for measuring and marking your wall before drilling any holes. Make sure that you have everything ready so that installation goes smoothly.
Once you have everything gathered, measure carefully from the top of the window to where you want the bottom of your pleated shade to hang. Also take into account any additional hardware that will be attached to the wall, such as brackets or clips for mounting your pleated shade in place. Mark this spot with a pencil or marker on either side of the window frame.
After marking off exactly where you want to mount your pleated shade features, it’s time to drill pilot holes into both sides of your window frame using an appropriate-sized drill bit. For more info, you can check out our article on the pros and cons of pleated window shades!
Be sure that they are level with each other and then insert screws into them for securing your pleated shade in place.
With these steps complete, you should now have successfully installed your pleated shades! Now onto measuring the window…
Measure the Window
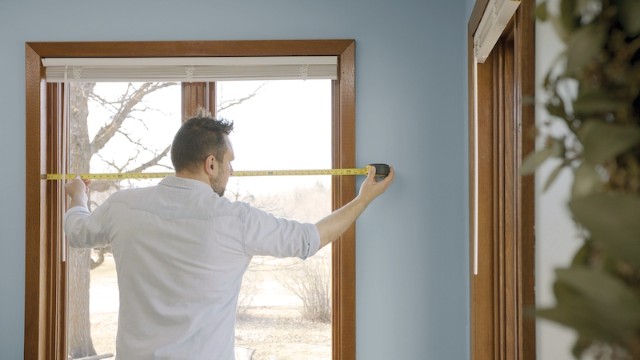
Measuring the window is an essential step when it comes to outfitting any space with new window treatments. Knowing the exact dimensions of the window will help you select the right size pleated shade.
It’s important to measure both the width and height of your windows, including any molding or trim that may be present. To ensure accurate measurements, use a metal tape measure – not a cloth/fabric measuring tape – and always measure in three places: across the top, middle, and bottom of each side.
After taking these measurements, note them down on paper or save them into your phone for easy reference later on.
You should also take note of whether your window has an inside or outside mount option available since this can affect what kind of mounting hardware you need to purchase later on.
Inside mount installations require special bracket kits that fit within your window frame while outside mount installations require brackets that attach directly to your wall above and around the edges of your window frame. Knowing ahead which mounting option you prefer will help narrow down options when selecting pleated translucent sheer blinds for your home.
Once you’ve taken all necessary measurements, write them down or save them in a secure place so they are easily accessible when you go shopping for pleated shades in order to make sure you choose one that fits properly in your desired space. Making sure all these steps are done carefully will ensure a successful installation process moving forward!
Choose the Mounting Option
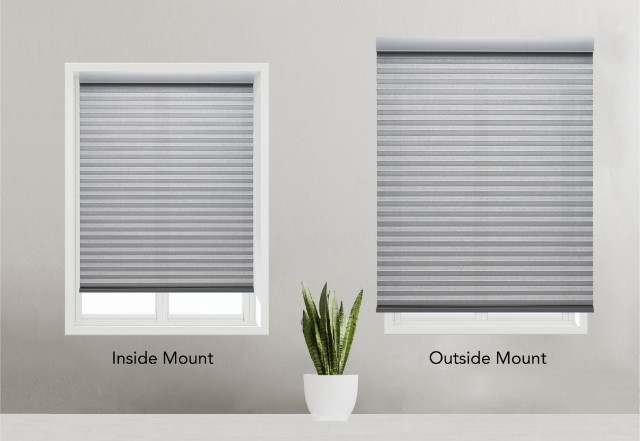
Deciding between an inside or outside mount for your window treatments is key to getting the best look and fit. An inside mount places the shade within the window frame, while an outside mount attaches it directly to the wall around the window. Here are a few things to consider when selecting a mounting option:
- When selecting an inside mount, make sure there is at least 1/2 inch of depth in the recess of the window frame.
- If you’re considering an outside mount, keep in mind that it may block some of the light coming through your windows.
- Make sure your pleated shades are wide enough so that they don’t overlap when installed on outside mounts.
- Consider how much privacy you need before deciding which mounting option is right for you.
Mounting options also play a role in controlling how much light comes into your home and can affect insulation properties as well as overall aesthetics. Remember that more control over light may require additional components such as side channels or valances, especially for those opting for an outside mount installation.
Whichever option you choose, take time to measure carefully and consult with experts if needed, so your pleated shades will look great and last for years to come! Now all that’s left is to mark up where on the wall or frame each shade will be placed…
Mark the Wall
Now it’s time to mark up the wall where you’ll be hanging your window treatments. With a few simple steps, you’ll have them installed in no time and be able to enjoy the beauty of your hand-picked shades!
Start by measuring the width of your shade, then use a pencil to mark two spots on the wall that are equal distance from either side of the window frame. As an extra precaution, double check your measurements before marking up the wall – you don’t want any surprises once you start installing!
Once you’re sure that all measurements are accurate, draw a level line across both marks with a yardstick or leveler. This ensures that when you install the brackets, they will be perfectly aligned. To make sure everything is just right, measure again and adjust as needed until both points line up evenly with each other.
Now that all marks are set for installation, it’s time to move onto installing the brackets. Make sure everything lines up correctly and has been measured accurately before drilling into place – this way, nothing will get messed up during installation!
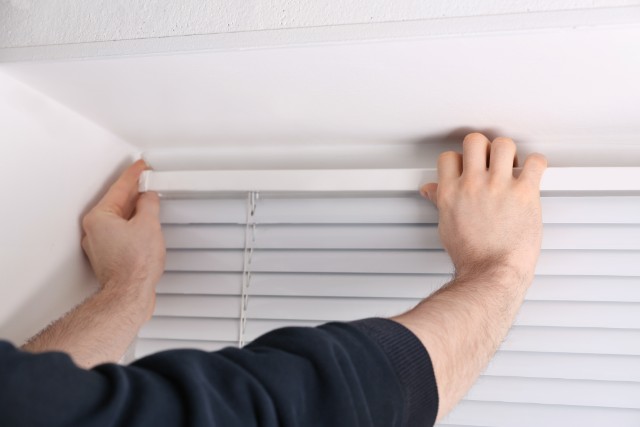
Install the Brackets
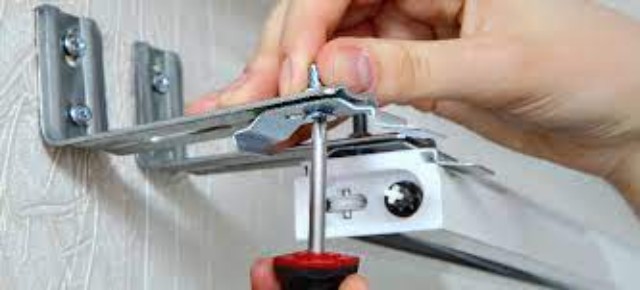
Using your drill, secure the brackets firmly into the wall – you want to make sure they’re in place before putting up the window treatments! Make sure that each bracket is level, and double check the measurements to ensure that they are both equidistant from either side of the window. You’ll need:
- A drill
- Screws for the brackets
- Level or measuring tape
When drilling into a wall, it’s important to be careful not to cause any damage – use a light pressure and be mindful of what lies beneath. Once all screws are secure, you should have two brackets firmly attached to your wall. Next up: attaching the shade to the brackets.
Attach the Shade to the Brackets
Attaching the shade to the brackets is the next step in transforming your window into a stylish focal point!
First, you’ll need to line up the holes on the back of the pleated shade with those on the mounting bracket. Once they are lined up, reach underneath and insert two screws from each side. Tighten them securely until they won’t move anymore.
Next, bring down both ends of the shade and make sure that it’s properly secured in place by tugging gently. You should feel some resistance if everything is correctly attached.
Finally, check that all four screws have been tightened correctly and that there are no gaps between the shades and brackets. This will ensure that your new pleated shades stay secure for years to come.
With everything now secure, testing your new shades is next in order to make sure they operate correctly! Also, check out our article on understanding solar shades if you’re interested in other shades!
Test the Shade
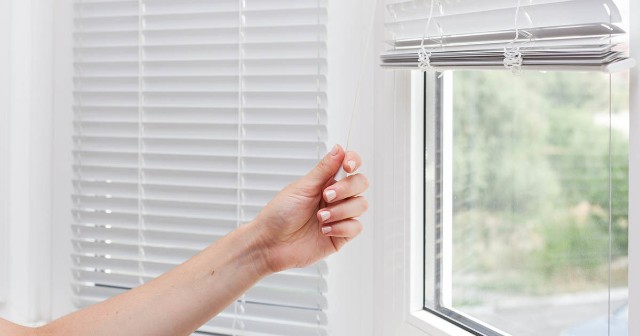
Next, we’ll want to test the shade to make sure it operates properly. Start by raising the blinds all of the way to the top. Then, press and hold down the bottom rail for about five seconds. If you hear a clicking sound, that indicates that your pleated shades are working correctly.
You can also lower your new pleated shades as a way of testing them out. Pull up on the bottom rail and then press and hold it down until you hear a clicking noise; this is an indication that they’re functioning properly.
When you release your grip on the bottom rail, your pleated shades should remain in their current position — if not, repeat this step again until everything functions smoothly. After verifying that our new pleated shades work perfectly, let’s move on to install the valance.
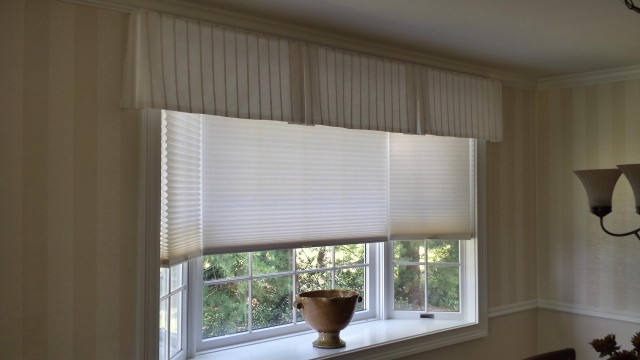
Install the Valance
Now you can finish your project and make it look amazing by installing the valance. This piece of hardware helps to give the pleated shade a neat, finished look that will take your window treatment to the next level, creating unique home accents.
To install it, begin by gathering all the necessary materials: a valance, screws or nails, and a screwdriver or hammer. Depending on your specific kind of valance, you may also need mounting brackets and adhesive strips.
Lay out the valance along the top edge of your window frame with its front side facing outward. Attach each end of the valance to either side of the frame using either screws or nails — whichever type is appropriate for your particular hardware.
Make sure that when you attach it, there is enough slack in between each side so that it hangs freely and evenly over each side without any buckling or sagging them.
Once attached securely on both sides, double-check to make sure everything looks even and flush with no gaps or overlaps anywhere. Now you’ve successfully installed your new pleated shade’s valance!
Adjusting tension levels is an important step if you want to ensure that your shades are secure and functioning properly for years to come.
Adjust the Tension
To keep your stylish window treatment options looking nice and secure, adjust the tension levels of your valance. The first step is to pull down on the valance at each end. This will cause it to hang more securely, while also enabling you to better see the tension adjustment screws located near the center rail.
You can then turn these screws clockwise or counterclockwise to adjust the tension level as needed. If you have trouble finding these screws, try using a flashlight or headlamp for extra visibility.
Once you’ve adjusted all of the tension screws, take a few steps back and check how even everything looks from afar. Make any additional adjustments if necessary and ensure that your pleated shades are properly taut throughout their length. If they feel too loose or too tight anywhere along their length, readjust them until they look just right!
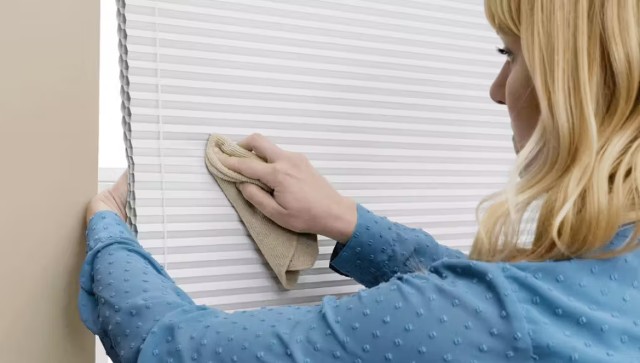
When finished, make sure all of your tools are put away and enjoy your newly installed pleated shades! They should provide years of enjoyment without needing much upkeep or maintenance beyond occasional dusting and cleaning.
Clean Up and Enjoy!
Once you’re finished adjusting the tension levels, it’s time to clean up and enjoy your beautiful functional window covering types! Start by disposing of all of the packaging materials and tools used in the installation.
Then, you’ll need to vacuum any dust or debris from the wall or window frame where the shades were installed. Next, check each shade for any loose threads or strings that may have been left behind during assembly, and give the pleats a gentle tug to help them fall into place.
To finish off your installation project:
- Wipe down any surfaces that were exposed to dirt or grime during installation with a damp cloth.
- Inspect each shade one last time to ensure everything is securely fastened before closing your shades for the first time.
- Open and close each shade several times to be sure they move smoothly along their tracks without getting stuck on anything.
- Clean up any leftover tools or supplies so you can store them away for future use!
Your pleated shades will add an extra layer of privacy, insulation, and style to your home now that they are installed correctly – no more worrying about whether they will stay in place! Also, do keep in mind the window safety measures for your kids and pet when installing it.
With just a few simple steps, you’ve created a new look for your windows that will last for many years of enjoyment – Congratulations!
Frequently Asked Questions
Conclusion
I’m done! Installing pleated shades was easier than I thought. Everything looks perfect, and I’m really proud of my work. With the right tools and a bit of patience, anyone can do this project.
Now that the brackets are in place and the tension is adjusted, all that’s left to do is enjoy the results of How To Install Pleated Shades.
The new pleated shades look great and provide just enough light for my room without compromising on privacy. Plus, they give my home an extra touch of style that I love!
And if you’re interested in pleated shades vs other coverings, check out our articles on differences between pleated shades and honeycomb and pleated vs cellular window coverings now!