When it comes to restoring out-of-door timber-made furnishing, there’s no time to ‘beat around the bush’. With the right approach, you can do a full restoration in a fraction of the time.
As a DIY enthusiast, I’m here to show you How To Restore Outdoor Wood Furniture swiftly at home. In this article, I’ll walk you through the entire process, from identifying the subject, predicate, and object to maintaining your furniture for ages to come.
So, let’s get started and get your out-of-door timber-made furnishing looking like new in no time with Nousdecor!
Key Takeaways
- Restoring out-of-door timber-made furnishing extends its lifespan
- Regular maintenance and cleaning are essential for maintaining out-of-door timber-made furnishing
- Cost-effective restoration methods include cleaning, drying, waterproofing, and painting
- Steps to retouch out-of-door timber-made furnishing include preparing, refinishing, repairing, and replacing damaged parts
What is Restoring Outdoor Wood Furniture
Restoring out-of-door timber-made furnishing is something I’m familiar with, as it can quickly turn your old, drab furniture into something beautiful and new.
To begin, I sand the surface of the wood to remove any dirt, grime, or old acrylic.
Then, I use a cloth to clean the furniture off, before implementing a finish, such as acrylic or sealant.
I also check out the various outdoor wood types to consider before choosing the best finish for timber-made patio furniture.
When it comes to painting, I make sure to follow the instructions on the can to achieve the best results.
With a few simple steps, I can retouch out-of-door timber-made furnishing swiftly at home.
Why Restore Outdoor Wood Furniture?
Restoring out-of-door timber-made furnishing is an important step in keeping furniture looking and functioning its best. Taking the time to retouch wood can add ages to its lifespan, improve its appearance, and ultimately save money in the long run.
It’s worth the effort to keep your outdoor furniture looking great and standing strong for ages to come.
To Extend its Lifespan
To extend the lifespan of out-of-door timber-made furnishing, I must maintain it regularly. This includes protecting it from deterioration by using a soft-bristled brush to remove any dust or dirt, followed by wiping it with a dry cloth.
Additionally, to keep the furniture looking its best, I should implement some teak oil to the wood. This can be done by working the oil into the wood by rubbing it with a clean cloth. To finish the maintenance process, I must implement a protective topcoat using a cloth and allow it to dry.
This final step helps to protect the wood furniture from moisture and other environmental factors. By following these steps and performing regular maintenance, I can ensure that my out-of-door timber-made furnishing will last for many ages.
To Improve its Appearance
To improve the appearance of my furniture, I regularly implement teak oil and a protective topcoat. This DIY approach helps the wood to resist water and damages that can occur over time.
I also use a wood stain to make the grain of the wood more visible and enhance the natural color. If I want to go a step further, I paint the wood furniture with a brush or roller. Best of all, this is all easy to do at home, so I save money on expensive services.
I also use the best tips to clean the furniture before and after these activities for maximum effect. In the end, my wood furniture looks great and I’m proud of my DIY efforts.
After all these steps, I’m ready to save money on the next section of my project.
To Save Money
I save money on my project by using DIY approaches and the best tips to clean the furniture.
To retouch out-of-door timber-made furnishing, I need to:
- Give the furniture a good cleaning: I use a mixture of water and mild detergent to remove dirt and grime.
- Sun dry it: After the wood is cleaned, I let it sit in the sun for a few hours to dry completely.
- Reapply waterproofing: This is important to ensure the wood is protected from the elements (see waterproofing wooden outdoor furniture).
- Sand it: I sand the furniture lightly to remove any rust or chipped paint.
- Paint it: I apply a fresh coat of paint to provide the furniture a fresh look.
Taking the time to complete these steps helps me retouch out-of-door timber-made furnishing in a cost-effective way. The result is furniture that looks as good as new, without the price tag.

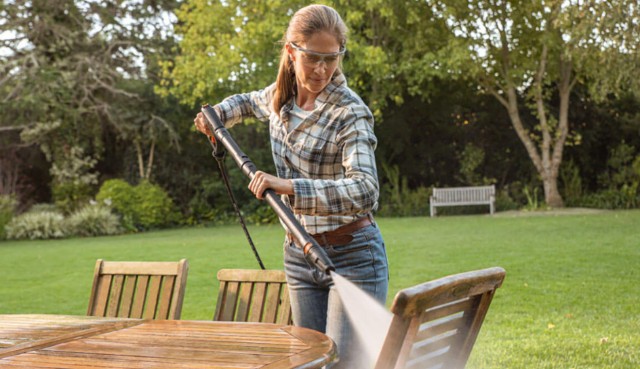
How To Restore Outdoor Wood Furniture
Restoring out-of-door timber-made furnishing can be a rewarding experience. I’m ready to take on the challenge and get my furniture looking like new again.
First, I’ll need to prepare the furniture by cleaning it.
Then, I can start the repairs.
Preparation
I’m ready to retouch my out-of-door timber-made furnishing and I’m starting with the preparation.
I want to make sure I’m ready to go with the right stain or paint and the right sealant for the job.
Prepare the Furniture
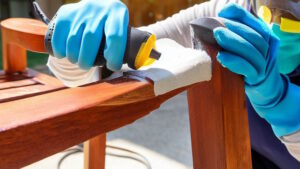
Preparing my out-of-door timber-made furnishing for restoration is the first step. I need to assess the condition of the furniture, remove any dirt or debris, and gently sand the surface.
Applying water to the wood can help to reveal years of wear and design.
Next, I must choose the right stain or paint color for how to refinish outdoor wood furniture and bring to it a fresh look.
Choose the Right Stain or Paint
Choosing the right stain or paint to refinish my furniture is essential to bring it a fresh look (see choosing paint for wooden patio furniture). I must consider its durability, color, and quality when selecting a finish for my out-of-door timber-made furnishing.
It’s important to consider furniture choices for your home, as well as an outdoor wood furniture care guide.
With the right combination of stain or paint, I’ll be able to retouch my out-of-door timber-made furnishing swiftly and easily.
Choose the Right Sealant
Selecting a sealant is an important step in ensuring my furniture lasts. My goal is to find the right one for the job:
- Durable sealant that won’t crack or peel
- Waterproof that won’t let moisture in
- UV resistant to protect against sun damage
- Low-odor option to keep it smelling pleasant
- Non-toxic formula to protect the environment.
With the right sealant, my wood furniture will look great and remain viable for years.
The next step is to repair the furniture.
Repair the Furniture
Having done the initial preparation, I’m ready to repair the furniture.
I’ll start by fixing any cracks or splits, then moving on to replacing any missing or damaged pieces.
With some patience and skill, the furniture will soon be ready to use again.
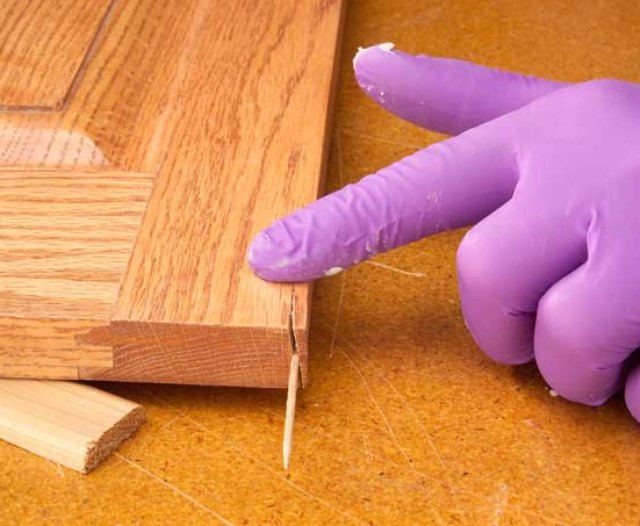
Fix any Cracks or Splits
I’m fixing any cracks or splits in my out-of-door timber-made furnishing.
Sanding, sealing, and patching will help retouch the wood’s integrity.
First, I’ll use sandpaper to smooth out the crack.
Next, I’ll apply a wood sealer to protect against moisture and weather.
After that, I’ll use a wood filler to fill in the crack.
Replace any Missing or Damage Pieces
To replace any missing or damaged pieces of my furniture, I’ll need to look for appropriate replacements that closely match the original pieces. I’ll need to measure the area to accurately fit the new part, then head to the hardware store to buy the materials.
I’ll need to make sure the paint and stain match, and get tools like a saw, chisel, and sandpaper. Once I’ve all of the pieces, I’ll begin to fit and secure them to the furniture.
Stain or Paint the Furniture
Painting or staining my out-of-door timber-made furnishing is the quickest way to retouch it. Preparing the surface by cleaning and sanding is the first step. I can clean the wood by using a cloth and a mild detergent. Then I’ll need to sand the wood to give the stain or paint a better surface to adhere to.
After that, I can select the type of stain or paint that I want to use:
- Oil-based stains or paints
- Latex paints
- Solid color stains
- Semi-transparent stains
- Epoxy paints
I’ll also need to decide if I need a primer or not, depending on the type of paint or stain that I choose. Once I’ve applied the stain or paint, I’ll need to seal it to protect it from the elements. This will ensure that my furniture looks great for many years to come.
Seal the Furniture
After the paint or stain is applied, sealing the surface of the furniture is essential for long-term protection. To do this, use a sealer designed specifically for outdoor furniture, as this will ensure that it’s waterproof and offers ultraviolet protection to keep it looking its best.
I like to use a brush to implement the sealer in even strokes, ensuring that I cover every inch of the furniture. When implementing the sealer, I make sure to go with the grain of the wood for the best results.
Once the sealer has been applied, it’s important to let it dry completely before using the furniture. This will help to ensure that the sealer has done its job and that the furniture is protected. By sealing the furniture, I’m able to enjoy it for seasons to come, knowing that it’s been properly maintained.
With that, I’m ready to move on to the next step of maintaining my restored out-of-door timber-made furnishing.
Maintaining Restored Outdoor Wood Furniture
Maintaining my restored out-of-door timber-made furnishing is key to keep it looking great. I’ll need to take a few steps to ensure it stays that way. Here’s a list of things to do:
- Clean it regularly: A little soap and water will do the trick.
- Apply a sealant: Sealants will protect the wood from water and sun damage.
- Cover it when not in use: A tarp or furniture cover will do the trick.
- Move it occasionally: Change up the furniture’s location to ensure it’s not sitting in one spot for too long.
- Monitor for signs of wear and tear: Be on the lookout for cracks, splinters, or any other damage.
Following these steps will help keep my out-of-door timber-made furnishing looking great for years to come.
Tips for Restoring Outdoor Wood Furniture
Restoring out-of-door timber-made furnishing can be a challenging task, but with patience, the right tools, and following the manufacturer’s instructions, it can be done with ease.
To ensure success, it’s important to test the stain or paint in an inconspicuous area before implementing it to the entire piece.
Be Patient
Being patient is key when restoring out-of-door timber-made furnishing at home. When I’m working on a restoration project, I make sure to take my hours and not rush the job.
Here are some tips on how to stay patient:
- I remind myself that it’s a labor of love.
- I break the project into smaller tasks.
- I take a break if I’m feeling stressed.
- I listen to music or watch a movie while I work.
- I plan rewards for when I finish.
These tips have helped me stay focused, motivated, and patient when restoring out-of-door timber-made furnishing.
After all, the end result is worth the effort. Plus, I’m proud of my accomplishment and the satisfaction of a job well done.
Now, let’s move on to the next step of the restoration process – using the right tools!

Use the Right Tools
I’m sure you’re eager to get started restoring your out-of-door timber-made furnishing, but don’t forget to be patient and use the right tools!
Sandpaper is your best friend here: it will help smooth out any rough patches and remove built-up dirt or grime. Make sure to use the correct grade of sandpaper – too coarse and you could damage the wood, too fine and it won’t be as effective. A sanding block is also great for getting into the corners and curves.
A good brush is essential for getting rid of any dust and debris, and if you’re implementing a fresh finish, make sure you’ve a brush specifically designed for that product.
It’s also important to have the right cleaning products to ensure you don’t damage the wood as you clean it. So before you start, double check you’ve all the tools and supplies you need to get the job done!
Follow the Manufacturer’s Instructions
Carefully following the manufacturer’s instructions is essential for restoring out-of-door timber-made furnishing properly. To ensure success in the restoration process, do the following:
- Read the product label thoroughly and follow all instructions as they’re written
- Check the material of the furniture to make sure it’s compatible with the product
- Apply the product evenly and in the right amount
- Let the product dry for the specified amount of minutes
- Test the product in an inconspicuous area of the furniture to make sure it doesn’t damage the material.
Failure to follow the manufacturer’s instructions can result in permanent damage to your out-of-door timber-made furnishing, so it’s important to take the time to do it properly.
Once the instructions have been followed, it’s time to test the stain or paint in an inconspicuous area.
Test the Stain or Paint in an Inconspicuous Area
After following the manufacturer’s instructions, I test the stain or paint on an inconspicuous area of the piece to make sure it won’t cause any damage. I find a place that won’t be immediately visible if the color looks wrong or the piece becomes damaged.
That way, I can make sure the new look is the right one before I move on to the rest of the furniture. Working quickly and carefully, I implement a thin layer of the stain or paint and let it dry. I check the color, texture, and coverage.
If I’m satisfied, I can move on to the entire piece. If I’m not, I can try again until I get the desired result. With patience and practice, I can retouch wood furniture swiftly and enjoy a beautiful new look.
Frequently Asked Questions
Conclusion
Restoring out-of-door timber-made furnishing is a rewarding and enjoyable process that can help bring your furniture back to life. With a few simple steps and a little bit of patience, you can retouch your out-of-door timber-made furnishing to its former glory in no time.
On average, a furniture restoration project can be completed in as little as two hours. So why wait? Start restoring your out-of-door timber-made furnishing today and experience the satisfaction of bringing it back to life!