Futons are a simple bit of furniture in several college dorm rooms and first apartments. Often, futon companies are highly similar in how that they construct their futons. But it can be complicated to determine how to set them together; every version of the futon has marginally different assembly instructions.
Check with the following instruction on How To Assemble A Futon Frame? For anyone who may need specific futon or furniture assembly directions.
Assembly Instructions for a Futon Frame

Laying out the parts
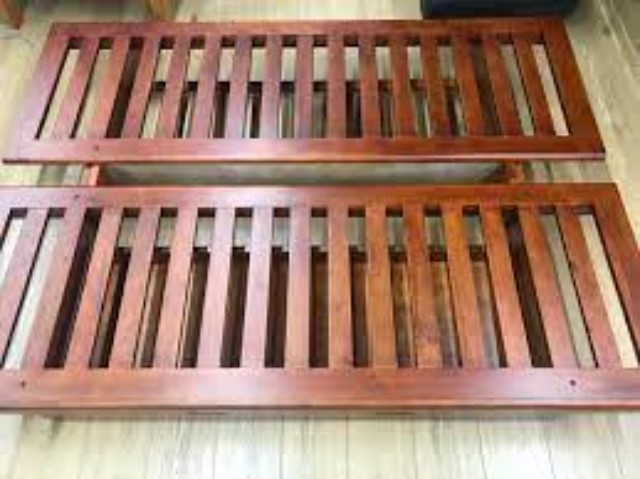
Be sure to have all the parts you need. In most cases, when you bought your futon, you probably had 6 major wood components. 2 arms, 2 rails along with a bench and rear section.
The back section appears different from the chair section since it’s 3 pre-drilled holes around the sides and the timber sides extending to enable the seat segment to be attached to it versus 1 or two holes on the chair segment.
Your hardware will consist of 2 bolts, 8 barrel nuts (shaped like a cone), 4 nylon pads, 6 steel hooks, 6 washers, 6 cotter clips, Allen wrench.
Attaching the hardware
Take the four nylon screws, 4 alloy hooks, and 4 cotter clips, and then locate the timber backrest of this futon. It’ll have the 3 holes drilled into every side. Two of those holes are close together, and also the 3rd hole is towards the bottom of the side. This gap alone will link into the chair section. The pliers have two endings: a little round top and a bigger round bottom.
The bigger round bottom is put against the timber over the hole, along with a metallic pin is pushed through the little round top throughout the roller and outside through the hole at the back rack. On the opposite side, slide a washer over the pin, make use of your cotter clip and push it through the little hole at the metal pin to fasten it. Repeat this step for another three pliers.
Next, locate the timber chair section and find the pit nearest to the finish on both sides. (Occasionally, wood chair pieces have two holes. The next gap to the center is for attaching what’s known as a kicker block. Your futon frame might or might not possess this.)
When you’ve located the holes onto the ends of the chair section, lay the timber seat, and rear sections confront up, meaning that the slats within this segment are facing upward or are nearest to the surface.
Take the two remaining metal pins and then push through the rest of the holes at the sides section through the holes in the chair section. Slide a washer over each pin and then fasten it using the remaining cotter clips.
Check out our list of the best futon in 2024: http://nousdecor.com/best-futon
Attaching the arms and stretchers
Locate both timber arms and 2 wood stretchers. Examine the arms and note that one facet of these arms has two hauled outside grooves. During the meeting, these hauled-out grooves will need to face inward towards each other. Then locate both stretcher rails. These railings will have 4 little round holes drilled out to the 1 side of the stretcher on the endings.
During assembly process, ensure that these holes face in towards the pockets of this stretcher across from it. Take your barrel nut and set it inside one of those holes meant for the barrel nut. Barrel nuts usually have a Phillips or flat screwdriver stage, and be sure that this is facing outside.
Also, be sure that the threaded hole at the barrel nut pops up with all the holes at the ends of the railing, as your bolt will probably want to thread to them. Now spend the bolt and then push it through the exterior of the arm and then to the railing threading it in the barrel nut, and then utilize your Allen wrench to end the screw to the socket nut.
Please repeat this step on the opposite bolts, leaving them loose. On the railing that’s closest to the hauled out grooves at the arms, depart two of your bolts and make sure this place permits you to maneuver the arm out slightly. (The reason behind this would be to make sure we could disperse the arms sufficient to find the chair and back section to the futon frame without scratching our arms).
Read also: https://blog.futonland.com/2017/10/futon-frame-maintenance.html
Transferring the back/seat section to the futon frame

The backrest has two nylon rollers on each side. The top roller has to be lined up using all the routed out grooves from the arms, which go down and up.
If you put in the pliers correctly, the conclusion of the rubber roller will probably fit in the groove and will push. (If it does not, your rollers are installed backward, take them off and turn them around to ensure the bigger portion of this roller is contrary to the timber.)
Take the ground rollers on each side and line them up to the hauled-out groove, which runs left to right. (This measure may call for a helper to find the pliers lined up in the grooves).
Important Note: Be sure the chair and rear section slats are facing up into where the mattress will break right onto them.
If it appears like the mattress will sit into the trunk and seat segment since the slats are confronting the floor, you will want to stop and turn the decks above and do that step.
Finishing assembly
Now, finish placing both bolts and barrel nuts to the rear arm and then join them together as mentioned in the measure mentioned above about attaching arms and stretchers. Go on and tighten each of the bolts. Tight sufficient but not overly tight. Your futon should now be prepared for use.
Read our guide on How to Clean a Futon Mattress: http://nousdecor.com/how-to-clean-a-futon
How To Assemble A Futon Sofa Bed?

Step 1. Check the parts
- Refer to the instructions for the specific futon sofa bed that you purchased.
- Get familiar with all the parts and mechanisms. This includes the hardware pieces like the nuts, screws, brackets, and pins.
- A bifold futon sofa will have a back deck, seat deck, arms, and legs for its main parts.
Step 2. Construct the futon frame and deck
- Begin with the futon sofa frame. Connect the stretchers to your arms using screws.
- Once the frame is built, line the front deck and back deck with the hinges. Then join them using the included pins.
- Futon sofa beds come in a variety of connection options. The most common are clevis pins or cotter pins.
- If your futon is not yet attached, you may need to attach the futon’s rolling on the back deck.
Step 3. Place the assembled deck into the frame
- Lower the frame into the deck by constructing the frame separately.
- Make sure the rollers fit in the grooves of the futon sofa bed’s arms.
- Make sure the arms are securely connected to the stretchers.
- To convert the futon into an actual couch, lift the deck.
- If you have any problems, take the rollers out and reinstall them.
How do you set up a trifold futon?
If you need a sofa to accommodate more people, a trifold futon is the best choice. The bifold can only hold two people, while the trifold can accommodate three. These steps can be used for all trifold futon sofa beds.
- Begin assembling the trifold futon frame. Attach the arms to your stretchers and attach the legs.
- Make sure slats have the slide rollers attached. If not, push them into position with pins. Tri-fold futons may come with slide rollers attached. The slide rollers are small, circular, and usually available in either black or white. Simply push the rollers into the slots in the sides of the slats if they aren’t already there. Attach them using clevis pins or cotton pins or using the connection method of your specific model.
- Place the slats on the frame and place the rollers in the grooves.
- Check that the frame is tightened and that the futon converts smoothly into a sofa.
- To change the position, raise the front portion of your slats. Push it back.
How do you disassemble a futon couch?
Futon frames come in different styles so that disassembly instructions will vary. To ensure a smooth assembly, always refer to the manual provided by your manufacturer.
- Place the futon in its preferred position.
- Use a wrench to remove the seat deck from each side.
- Continue the process of removing the back deck.
- Take out the bolts and connection system that connect the arms to the stretchers.
Conclusion
You might also want to check out the instructions booklets found here. Many futon manufacturers are similar in how they make their futons. While futon quality can vary from one manufacturer to the next, these futons and other furniture instruction booklets will give you a good start.
I hope that this guide can get you through the assembly process of your futon, so it is possible to begin using and enjoying it once more. Thank you for choosing to spend time together with Nousdecor.com. We appreciate your support.