Simple DIY rustic console table plans are perfect blend of functionality and farmhouse-inspired style, offering a charming addition to any entryway or living room. Building your own coffee table allows you to customize the design to fit your space and needs while showcasing your woodworking skills and creativity.
This article will guide you through the process of creating a stunning handmade console table using reclaimed-wood, providing step-by-step instructions, tips for achieving the desired aesthetic, and ideas for styling your finished piece.
Takeaways
- DIY console tables are rewarding, cost-effective, and customizable
- Reclaimed-wood adds eco-friendliness and character to the rustic design
- Essential tools and materials include wood, saws, drills, sanders, glue, clamps, and hardware
- Master basic wood-working skills for a successful project
- Incorporate natural imperfections and weathered appearance for rustic charm
- Customize dimensions, storage, and mix materials for uniqueness and functionality
- Choose the right finish and stain for desired appearance
- Avoid common mistakes for a high-quality, durable table
- Style the table with focal points, layered accessories, textures, and balance
- Regular maintenance preserves longevity and appearance
- The completed table inspires future projects and adds warmth to your decor
Below is the video on how to make a free DIY wooden table for your reference
Benefits of Building Your Own Console Table
This offers numerous benefits, including cost-effectiveness, customization, and the satisfaction of crafting a unique piece of furniture. DIY projects enable you to save money compared to purchasing a ready-made table while ensuring that the final product perfectly fits your space and style preferences. Additionally, the process of building your own entry table allows you to develop valuable woodworking project and take pride in your handmade creation.
Understanding the Farmhouse Style and Aesthetic
The farmhouse style and aesthetic are characterized by a cozy, warm, and inviting atmosphere that celebrates natural materials, vintage elements, and simple, functional design. Rustic furniture often features weathered wood, distressed finishes, and industrial hardware, creating a charming, lived-in look.
Choosing the Right DIY Rustic Console Table Plans
Selecting the appropriate DIY console table with plans is crucial for ensuring a successful project that meets your specific needs and skill level. A well-designed plan should include detailed diagrams, a clear materials list, and step-by-step instructions that guide you through the entire building process.
Consider factors such as the desired size, storage features, and overall design when choosing a plan that aligns with your vision for the perfect entryway table.
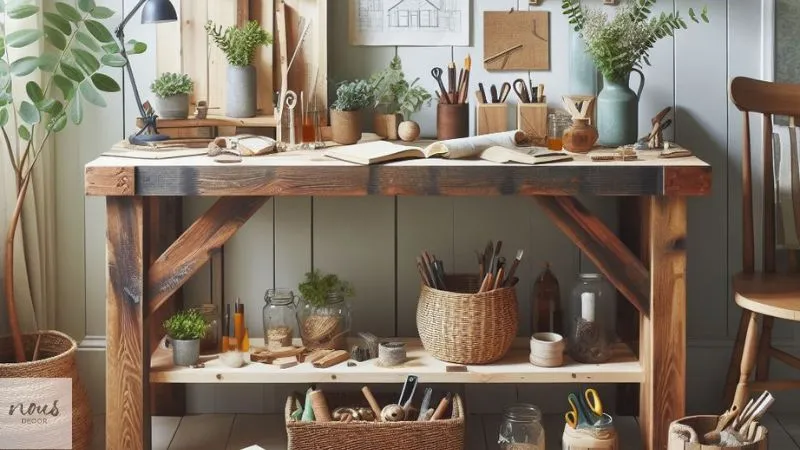
Essential Tools and Materials
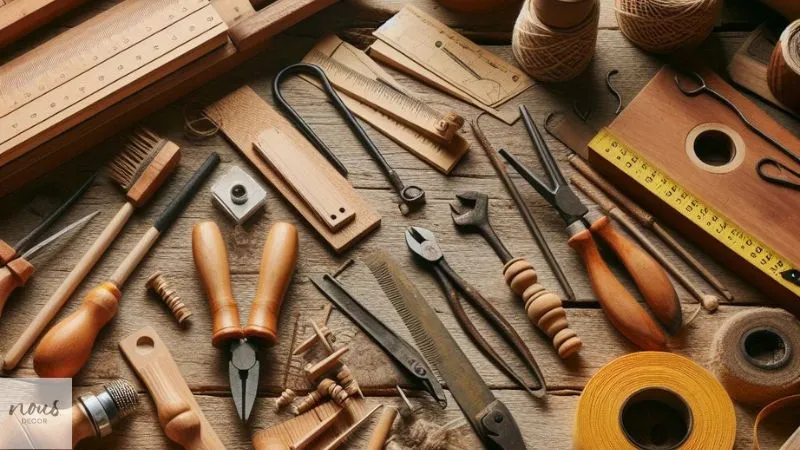
For beginner to build this diy console table, you will need a range of essential tools and materials. These include:
- Reclaimed wood or lumber
- Measuring tape and pencil
- Saw (circular, miter, or table saw)
- Drill and drill bits
- Sander and sandpaper
- Wood glue and clamps
- Pocket hole screws, nails, and other hardware
- Paint, or finish of your choice
Having the right tools and materials on hand before starting your project will ensure a smooth and efficient building process.
Selecting and Preparing Reclaimed Wood for Your Project
This type of wood is an eco-friendly and characterful choice. When selecting it, look for pieces with interesting grain patterns, knots, and weathering that will contribute to the table’s rustic charm. Before beginning construction, thoroughly clean and inspect the wood for any nails, pocket hole screws, or other debris. Sand the wood to remove splinters and rough spots, and consider applying a wood conditioner to ensure even stain absorption.
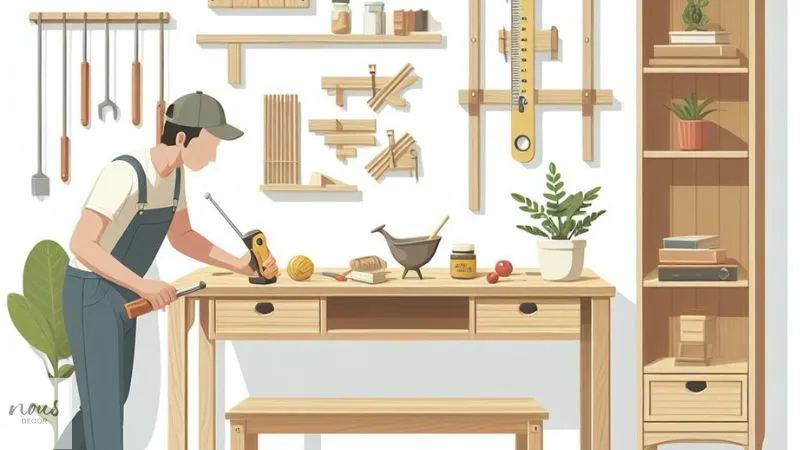
Basic Woodworking Skills and Techniques
To successfully build your project, it is essential to master fundamental woodworking skills and techniques. These include:
- Measuring and marking: Accurately measuring and marking your piece of wood is crucial for ensuring a precise and well-fitting final product.
- Cutting: Using the appropriate saw and technique for each cut will help you achieve clean, straight lines and angles.
- Joining: Understanding basic joinery methods, such as dowels, or mortise and tenon, will enable you to create strong and stable connections between your table components.
- Sanding and finishing: These techniques will help you achieve a smooth, polished look that enhances the natural beauty of the wood.
Building a Simple Wood Console Table Tutorial
It typically involves the following steps:
- Cut all wood pieces to the required dimensions according to your chosen plan.
- Assemble the table frame, joining the legs, aprons, and stretchers using your preferred joinery method.
- Attach the tabletop to the frame, ensuring a secure and level fit.
- Sand the entire table to remove any rough spots and prepare the surface for finishing.
- Apply your chosen paint, or finish, following the manufacturer’s instructions for best results.
- Install any additional hardware, such as drawer pulls or decorative accents.
- Allow the table to dry completely before use.
Incorporating Natural Imperfections and Weathered Appearance in Your Design
One of the hallmarks of furniture is the celebration of natural imperfections and weathered appearance. When building your console table, embrace the unique characteristics of yourwood, such as knots, cracks, and variations in color and texture.
These imperfections add character and authenticity to your piece, contributing to its overall rustic charm. You can further enhance the weathered look by applying techniques such as distressing, or sanding the wood to create a sense of age and patina.
Customizing Your DIY Console Table
One of the advantages is the ability to customize the plan to fit your specific space and needs. Consider the following factors when adapting your chosen plan:
- Dimensions: Adjust the length, width, and height of your table to ensure a perfect fit for your entryways or living room.
- Storage: Incorporate drawers, shelves, or baskets into your design to provide additional storage options for items like keys, mail, or decorative accessories.
- Style: Modify the design elements, such as leg shape or hardware selection, to align with your personal style preferences and existing home decor.
Adding Storage Features
Incorporating storage features into your design can greatly enhance its functionality and practicality. Some popular storage options include:
- Drawers: Installing drawers provides a convenient place to store smaller items out of sight, keeping your entryway or living room clutter-free.
- Shelves: Adding a lower shelf to your table creates an additional surface for displaying decorative items, storing books, or organizing baskets.
- Baskets: Placing woven baskets or bins on the lower shelf offers a stylish and flexible storage solution for various household items.
When incorporating storage features, be sure to adjust your plan accordingly and consider the overall balance and proportions of your table design.
Mixing Wood and Metal Elements for an Industrial Look
Combining wood and metal elements in your rustic X console table design can create a striking industrial look that complements the farmhouse aesthetic. Consider incorporating metal accents such as:
- Hairpin legs: Replace traditional wooden legs with sleek hairpin legs for a modern, industrial touch.
- Metal brackets: Use metal brackets to secure shelves or to add decorative flair to your table’s apron.
- Industrial hardware: Opt for metal drawer pulls, hinges, or casters with an industrial finish, such as black or oil-rubbed bronze.
Choosing the Right Finish and Stain
The finish and stain you choose will significantly impact its final appearance and durability. Some popular options for achieving a look include:
- Natural wood tone: Enhance the inherent beauty of your wood by applying a clear protective finish, such as polyurethane or wax, to showcase the wood’s natural color and grain.
- Weathered gray: Create a weathered, beachy look by applying a gray wood color or whitewash technique, which mimics the appearance of driftwood.
- Warm, rich tones: Opt for a warm, brown color to enhance the cozy and inviting feel of your table, complementing the farmhouse style.
Common Mistakes to Avoid
To ensure this successful DIY project, be aware of these common mistakes and take steps to avoid them:
- Not properly preparing the wood: Failing to clean, sand, and treat your wood before construction can result in a rough, splintered, or uneven finished table.
- Inaccurate measurements and cuts: Double-check all measurements and make precise cuts to avoid gaps, wobbles, or ill-fitting joints in your table.
- Inadequate joinery: Using weak or insufficient joinery techniques can compromise the stability and durability.
- Rushing the finishing process: Allow ample time for paints, and finishes to dry completely before handling or using your table to prevent smudges, fingerprints, or damage to the surface.
Tips for Project Cost-Effective
It can be a cost-effective alternative to purchasing a ready-made piece. To further reduce expenses:
- Source wood from local salvage yards, online marketplaces, or construction sites, often available at a lower cost than new wood.
- Utilize tools and equipment you already own or consider borrowing from friends or family members.
- Opt for affordable hardware and finishing options that still achieve the desired look without breaking the bank.
Plan your project carefully to minimize waste and avoid costly mistakes or material overages.
By implementing these cost-saving strategies, you can create a stunning table without exceeding your budget.
Styling and Decorating
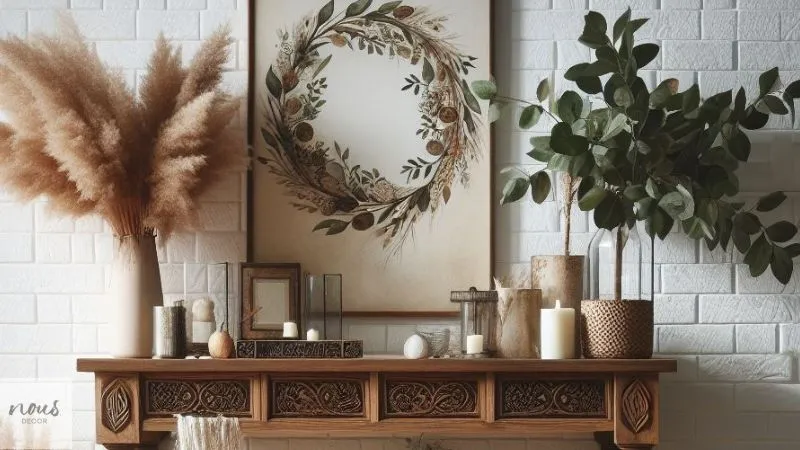
Once your easy DIY table is complete, it’s time to showcase its beauty through thoughtful styling and decoration. Consider the following tips:
- Create a focal point: Place a statement piece, such as a large mirror, artwork, or wreath, above your console table to draw the eye and establish a visual anchor.
- Layer accessories: Arrange a mix of decorative items, such as vases, candles, books, and greenery, on your table’s surface to create depth and visual interest.
- Incorporate texture: Combine elements with varying textures, such as woven baskets, metal lanterns, or chunky knit throws, to enhance the cozy feel of your space.
- Balance the arrangement: Ensure your table styling is balanced and symmetrical, with taller items placed in the back and smaller accessories in the front.
Showcasing in Your Home
Your completed DIY simple console table is a testament to your craftsmanship and creativity, deserving a place of pride in your home. Consider showcasing your table in the following areas:
- Entryway: An X console table makes a welcoming statement in your foyer, providing a convenient spot for keys, mail, and decorative accents.
- Living room: Position your table behind a sofa or against a wall to create a functional and stylish display surface for books, plants, and family photos.
- Dining room: Use your table as a sideboard or buffet, offering additional storage and serving space for entertaining.
Maintaining and Caring
To ensure your DIY project remains in excellent condition for years to come, follow these maintenance and care tips:
- Dust regularly: Use a soft, dry cloth to remove dust and debris from your table’s surface and any decorative items.
- Clean spills promptly: Wipe up any spills or stains immediately to prevent damage to the wood or finish.
- Protect from direct sunlight: Avoid placing your table in direct sunlight, which can cause the wood to fade or crack over time.
- Re-apply finish as needed: Periodically check your table’s finish and re-apply a protective coat if necessary to maintain its luster and durability.
Inspiring Ideas for DIY Projects
Once you’ve successfully completed your console table, you may be inspired to tackle additional furniture projects. Consider these decor ideas for your next DIY endeavor:
- Coffee table: Create a matching table with the wood and industrial accents to complete your living room ensemble.
- Farmhouse dining table: Build a large dining table with a distressed finish and chunky legs to host family gatherings and dinner parties.
- Bookshelf: Construct a wood bookshelf with metal brackets or pipe fittings for a stylish and functional storage solution.
- Barn door headboard: Repurpose an old barn door or create a new one to serve as a statement headboard in your bedroom.
- Bathroom vanity: Transform a vintage dresser or build a custom vanity with the wood for a one-of-a-kind bathroom centerpiece.
By exploring these and other furniture DIY projects, you can continue to develop your woodworking skills and infuse your home with the warmth and character of the farmhouse-style console.
Frequently Asked Questions
Conclusion
Building your own DIY console table is a rewarding experience that allows you to create a functional and stylish piece of furniture while embracing the charm and character of the farmhouse aesthetic. By following the steps outlined in this article and utilizing the tips and techniques provided, you can successfully craft a beautiful console table that showcases your skills and complements your decor.
As you incorporate your handmade console table into your living space, remember to:
- Celebrate the unique imperfections and weathered appearance of your wood
- Experiment with different finishes and styling options to achieve your desired look
- Maintain and care for your table to ensure its longevity and beauty
- Draw inspiration from your completed project to tackle future furniture DIY endeavors
By embracing the charm in your home decor, you can create a warm, inviting, and personalized atmosphere that reflects your style and craftsmanship. Your design will serve as a testament to your creativity and a cherished focal point in your home for years to come.
If you do not have time, you can buy a new entry table, I suggest mid-century modern console table.